
Upgrading your PC’s storage with an SSD is a great way to boost your system’s performance. But what do you do with your old hard drive? Instead of letting it collect dust, why not repurpose it into an external storage device? Converting your old SSD into an external drive is a simple process that can save you money and increase your storage capacity. In this step-by-step guide, we’ll show you how to convert SSD to external drive and make the most of your old hardware.
So, grab your screwdriver and let’s get started!
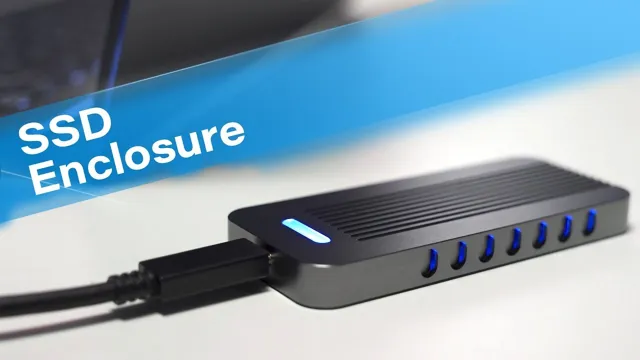
Choose an Enclosure
If you’re looking to convert your solid-state drive (SSD) into an external drive, the first thing you’ll need to do is choose an enclosure that’s compatible with your SSD’s form factor. Enclosures come in different shapes and sizes, so make sure you choose one that can accommodate your SSD’s dimensions. You’ll also need to consider the interface type that the enclosure supports.
The most common types are USB 0 and Thunderbolt, but there are also enclosures that support other types, such as eSATA and FireWire. Once you’ve chosen the right enclosure, it’s just a matter of inserting your SSD into it and connecting the cables.
Then you can start using your SSD as an external drive, with all the benefits of speed and reliability that come with solid-state technology. So, if you’re wondering how to convert a SSD to an external drive, just remember that it all starts with choosing the right enclosure.
Consider the Type of SSD and Connection Interface
When it comes to choosing an enclosure for your solid-state drive (SSD), it’s important to consider the type of SSD and connection interface. There are two main types of SSDs: SATA and NVMe. SATA SSDs are the most common, and they use a standard SATA interface that’s found on most computers.
NVMe SSDs, on the other hand, use a newer, faster interface that’s designed specifically for SSDs. If you have an NVMe SSD, you’ll want to look for an enclosure that supports the NVMe interface. Another consideration is the connection interface.
The most common types of connection interfaces are USB and Thunderbolt. USB enclosures are more affordable and widely available, but they may not provide the fastest transfer speeds. Thunderbolt enclosures are more expensive, but they offer faster speeds and can handle larger files.
If you’re working with large files, such as video or high-resolution images, a Thunderbolt enclosure may be your best bet. When choosing an enclosure, it’s important to make sure it’s compatible with your SSD and connection interface. You’ll also want to consider factors like durability, portability, and ease of use.
Look for enclosures that are made from sturdy materials, have a compact design, and include features like tool-free installation and hot-swapping. With the right enclosure, you can make the most of your SSD’s speed and performance, and enjoy faster data transfer and storage.
Choose an Enclosure Based on Your Needs and Budget
Choosing the right enclosure for your needs and budget is crucial. Whether you need an enclosure for personal or commercial use, there are a variety of options that offer different levels of protection, durability, and functionality. Think about your needs and the environment in which the enclosure will be used.
Will it be exposed to harsh weather conditions or heavy foot traffic? Do you require a sophisticated locking system for security reasons? These are all factors to consider when choosing the right enclosure. Your budget is also a crucial factor to consider. There are a variety of enclosures available at different price points, so it’s important to choose one that meets your needs without breaking the bank.
Ultimately, the right enclosure should provide the protection, durability, and functionality that you require at a price that fits your budget.
Prepare your SSD for Transfer
If you want to convert your SSD into an external drive, you’ll need to prepare it for transfer. Firstly, you’ll need to back up all the data on the SSD to avoid losing any important files during the transfer process. After backing up the data, you’ll need to format the SSD to remove any existing data and partitions that may interfere with the transfer.
Once formatted, you’ll need to connect the SSD to an external enclosure that will allow you to connect it to a computer or laptop. The enclosure will also protect the SSD from damage during use. After connecting the enclosure, your SSD should now be recognized as an external drive on your computer.
It’s essential to ensure that you properly disconnect it from your computer when finished to avoid potential data loss. By following these steps, you can easily convert your SSD into an external drive and utilize it for various storage purposes.
Backup Your Data
Backing up your data is of utmost importance when preparing your SSD for transfer. This is because the transfer process can be a daunting task with the fear of losing important files looming. Before you transfer, it is imperative to backup all important data either on the cloud or an external drive.
This will ensure that your files are safe and can be retrieved in case of any accidents in the transfer process. Additionally, ensuring that your data is safe will give you peace of mind during the transfer process. In summary, backing up your data is a crucial step before transferring your SSD, and failure to do so can be catastrophic.
Remove the SSD from Your Computer
When it comes to transferring data from one computer to another, it’s important to properly prepare your SSD. One of the first steps is to remove the SSD from your computer. This can be a daunting task for some, but don’t worry, it’s actually quite simple.
First, shut down your computer and unplug it from any power source. Then, use a screwdriver to open the computer case and locate the SSD. It’s usually a small rectangular device with a SATA connector.
Carefully unplug the connector and gently remove the SSD from its slot. It’s important to handle the SSD with care and avoid touching the gold connectors. Once removed, place the SSD in an anti-static bag to protect it from any potential damage.
By following these steps, you’ll be well on your way to preparing your SSD for transfer.
Install SSD in the Enclosure
If you’re looking to convert your SSD into an external drive, the first step is to install it in an enclosure. An enclosure is essentially a case that allows you to connect your SSD to your computer via USB or some other interface. To install your SSD in an enclosure, start by selecting an enclosure that’s compatible with your SSD’s form factor.
Once you’ve chosen your enclosure, open it up and locate the slot where you’ll be placing your SSD. Depending on the enclosure, this could involve simply sliding your SSD into place or screwing it in with the supplied hardware. Once your SSD is securely in place, reassemble the enclosure and plug it into your computer.
Your SSD should now be recognized as an external drive, ready for you to use as you see fit. With this quick and easy process, you can turn your SSD into a portable powerhouse that you can take with you wherever you go.
Disassemble the Enclosure
When it comes to installing an SSD in an enclosure, the first step is to disassemble the enclosure. This might seem daunting at first, but it’s actually quite simple if you take your time and follow the instructions carefully. Start by removing any screws or clips holding the enclosure together, and then gently pry it apart.
Once you have access to the inside, you can begin the process of installing the SSD. Make sure to carefully read the instructions that came with your enclosure to ensure that you don’t damage anything in the process. With a little patience and attention to detail, you’ll have your SSD installed in no time.
Install the SSD into the Enclosure
When it comes to installing an SSD into an enclosure, the first step is to make sure you have all the necessary tools. You’ll need a screwdriver, screws, and the enclosure itself. Once you have everything ready, the next step is to carefully slide the SSD into the enclosure, making sure all the connectors are aligned.
Then, secure the SSD in place using the screws provided with the enclosure. It’s important to be gentle throughout the process to ensure that you don’t damage any of the components. Once the SSD is securely installed in the enclosure, you’re ready to start using it.
So, why not give it a try and see how much faster your computer can run with an SSD?
Reassemble the Enclosure
After successfully cloning your old hard drive onto your new SSD, it’s time to reassemble the enclosure. Installing your SSD into the enclosure is a simple process that involves placing the drive into the designated slot and then securing it in place with screws. To start, locate the SSD enclosure and gently slide the SSD all the way in until it clicks into place.
Once the SSD is securely in place, use the screws provided to fasten it in. It’s important to make sure the screws are tightened enough to secure the SSD but not so much that they cause damage. Once you’re sure the screws are in place, reattach the enclosure cover and start up your computer.
Congratulations! You have now successfully installed your new SSD and can enjoy lightning-fast speeds as you work and play.
Connect Your External Drive to Your Computer
Are you looking to convert your SSD into an external drive for portable storage? The easiest way is to connect your external drive enclosure kit to your computer using a USB cable, insert the SSD into the enclosure, and screw it into place. Then, plug the enclosure’s USB cable into your computer and wait for it to recognize the device. From there, you can format the external drive and start using it for data storage or backups.
Keep in mind that you may need to download drivers or software specific to your enclosure kit to ensure compatibility with your computer. With a little patience and a few simple steps, you can easily convert your SSD into an external drive and enjoy all the benefits of portable storage.
Connect the Enclosure to Your Computer
Connecting your external drive to your computer is a simple process with the right tools. The first step is to connect the enclosure to your computer using a USB cable. Always ensure that the cable is compatible with your computer’s USB port for efficient data transfer.
Next, power up the external hard drive by connecting the enclosure’s power supply to a power outlet. Once the drive is powered up, your computer should automatically detect it and install any necessary drivers. If it doesn’t, you may need to manually install the drivers from the enclosed driver disk or the manufacturer’s website.
Once the computer recognizes the external drive, you can begin transferring files and data seamlessly and easily. Just remember to safely eject the drive after use. Happy Storage!
Format the Drive
When it comes to formatting your external drive, the first step is to connect it to your computer. This process is usually straightforward, and most modern computers will recognize the drive immediately after it’s plugged in. Once connected, you’ll need to navigate to your computer’s file management system, which can be accessed through the Start Menu on Windows or Finder on Mac.
From there, you’ll be able to see your external drive listed and can begin the process of formatting. Keep in mind that formatting will delete all of the data on your drive, so it’s essential to back up any important files or documents before proceeding. By formatting your external drive, you can ensure that it’s free of any errors or problems that could affect its performance, making it an essential step in maintaining your computer’s storage system.
Conclusion: Enjoy Your External SSD Drive!
In conclusion, converting an SSD to an external drive may seem like a daunting task, but fear not! With a little bit of technical know-how and some creativity, you can transform that old, unused SSD into a powerful and portable storage solution. Just remember to cross your i’s and dot your t’s when it comes to connecting the drive to your computer, and you’ll be ready to store, transfer, and show off your digital files in style.”
FAQs
What tools do I need to convert my SSD to an external drive?
You will need an external drive enclosure and a screwdriver to convert your SSD to an external drive.
Is it possible to convert any SSD to an external drive?
Yes, as long as the SSD is a standard size (e.g. 2.5-inch or M.2), you can convert it to an external drive with the appropriate enclosure.
Will I lose my data if I convert my SSD to an external drive?
No, you will not lose any data if you properly transfer your files from the SSD to the external drive before converting it.
Can I use my external SSD on multiple computers?
Yes, you can use your external SSD on multiple computers as long as the computers have the necessary ports to connect to the external drive.