Are you looking to upgrade your gaming experience on your PlayStation 4 (PS4)? One way to enhance the performance of your console is by connecting a solid-state drive (SSD) to your PS An SSD is a type of storage device that uses flash memory to store data, making it faster and more reliable than a traditional hard disk drive (HDD). Connecting an SSD to your PS4 can improve load times, reduce lag, and increase overall performance.
In this blog post, we’ll guide you through the process of connecting an SSD to your PS4, so you can get the most out of your gaming sessions. So sit back, grab your controller, and let’s get started!
Check Compatibility
If you’re wondering how to connect an SSD to your PS4, there are a few things you need to know. The first thing to check is whether your SSD is compatible with the PS Generally, the PS4 supports external hard drives that are up to 8TB and have a USB
0 connection. However, not all SSDs meet these requirements, so it’s important to double-check the specifications of your SSD before trying to connect it to your PS Once you’ve confirmed compatibility, the next step is to connect your SSD to your PS4 using a USB cable.
You can then format your SSD to be used with your PS4 by going to the Settings menu and selecting Devices -> USB Storage Devices -> Format as Extended Storage. Following these steps will allow you to expand your PS4’s storage capacity with an SSD, giving you more space to store your games and other data.
Check PS4 Model
If you’re planning on upgrading or purchasing a PS4, it’s important to know which model you have in order to ensure compatibility with the games and accessories you want to use. There are several different versions of the PS4, including the original “fat” model, the slim model, and the more recent Pro model. One way to determine which model you have is to check the serial number on the back of the console.
Another method is to look at the physical appearance of the console, such as its size and shape. Keep in mind that even within the same model, there may be different versions with different hardware specifications. Checking the model and compatibility before making any purchases can save you time, money, and frustration in the long run.
So, take some time to do your research and ensure that your gaming experience is top-notch with the right PS4 model.
Check SSD Compatibility
When it comes to upgrading your computer’s storage with an SSD, it’s important to check compatibility before making a purchase. Not all computers can support all types of SSDs, so it’s important to do your research. The first thing you should consider is the interface.
SATA is the most common interface for SSDs, but some newer models have PCIe interfaces. You should also check whether your computer supports NVMe, which is a newer technology that allows for faster data transfer speeds. Another thing to consider is the size and form factor of the SSD.
Some computers can only accommodate certain sizes, so make sure to check your computer’s specifications before making a purchase. By doing your homework and checking compatibility, you can ensure a smoother and more successful SSD upgrade.
Prepare Equipment
If you’re wondering how to connect your SSD to your PS4 and boost your gaming experience, then you’ve come to the right place! The first step is to prepare your equipment. You will need an SSD and a compatible enclosure case that connects the SSD to your PS Make sure to choose an enclosure that is compatible with both your SSD and your PS
If you’re unsure about the compatibility, consult the manufacturer’s website or customer support. Next, remove the HDD (hard disk drive) from your PS4 by following the instructions provided in the user manual. Carefully connect the SSD to the enclosure and secure it in place.
Finally, plug the enclosure into the PS4 using a USB cable and turn it on. Boot your PS4 and format your SSD, following the on-screen instructions. Congratulations, you’re ready to enjoy faster loading times, smoother gameplay and improved performance!
Ensure Working Condition of SSD
When it comes to ensuring the working condition of your SSD, it’s essential to prepare your equipment properly. The first thing you should do is ensure that you have all the necessary tools and equipment on hand. This includes anti-static gloves and a grounding strap to avoid any electrostatic discharge, which can damage the SSD.
You should also have a clean and well-lit work area to prevent any accidental damage. Before beginning any work on your SSD, make sure that you have a backup of all your data. It’s always better to be safe than sorry, so be sure to back up your files to an external drive or cloud storage before starting.
By taking these simple steps, you’ll help ensure that your SSD is working correctly and prevent any potential data loss or damage.
Get An External Enclosure
If you have an old hard drive lying around that you no longer use, don’t just get rid of it! Get an external enclosure and turn that old drive into a useful tool. With an external enclosure, you can easily connect the drive via USB or another interface and use it as a backup or extra storage device. Not only is this a great way to repurpose old equipment, but it can also save you money that you would have spent buying a new external hard drive.
So, if you have a spare hard drive and need some extra storage, getting an external enclosure is definitely worth considering!
Install SSD to PS4
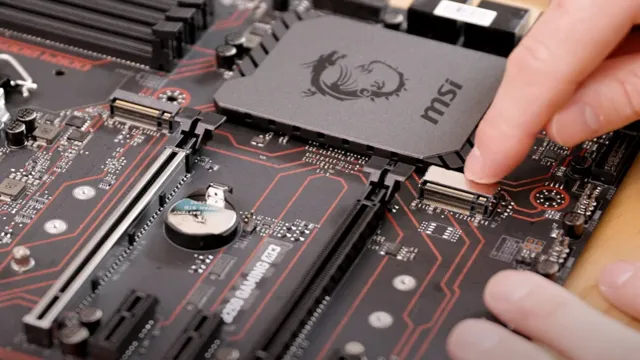
If you’re looking to upgrade your PS4’s storage, installing an SSD can significantly improve load times and performance. Connecting an SSD to your PS4 is a straightforward process that requires only a few tools and some basic knowledge. Firstly, make sure your SSD is compatible with the PS4, and purchase a mounting bracket for the
5-inch SSD. Then, power off your PS4 and remove the hard drive cover using a Phillips-head screwdriver. Carefully lift the hard drive out, detach it from the bracket, and replace it with the SSD.
Secure the SSD with the mounting bracket, reattach the hard drive cover, and power on your PS Finally, you’ll need to reinstall the system software and any games or applications you want to use. With your new SSD installed, you’ll be able to enjoy faster load times and smoother gameplay on your PS
Remove PS4 Cover
If you’re looking to boost your PS4’s storage capacity, installing an SSD is a great way to go. But before you can do that, you’ll need to remove the PS4 cover. Don’t worry, you don’t need to be a tech expert to accomplish this task.
To start, grab a Phillips screwdriver and locate the two screws on the back of your PS Once you remove them, gently slide the cover off. You’ll notice that there are clips holding the cover in place, so be careful not to break them.
If you’re having trouble, there are plenty of online tutorials to guide you through the process. Once you’ve removed the cover, you’ll have access to the hard drive. Simply swap it out with your new SSD and reassemble the console.
It’s that easy! Installing an SSD can improve your PS4’s performance and load times, so it’s definitely worth the effort. Plus, with the added space, you’ll have more room for all your gaming needs.
Install SSD to External Enclosure
If you’re an avid gamer, you know the frustration of running out of space on your PS Thankfully, there’s a solution! You can install an SSD to an external enclosure and upgrade your PS4’s storage space. But before you start, make sure you choose a compatible enclosure.
Look for one with a USB 0 port and SATA III compatibility. Then, you’ll need to remove the HDD from your PS4 and replace it with the SSD.
Don’t worry, it’s not as complicated as it sounds. There are plenty of tutorials available online to guide you through the process. Once you’ve installed the SSD, you’ll need to initialize it and format it using your PS
And that’s it! You’ll have plenty of extra space to store all your favorite games and never have to worry about running out of storage again. So, why wait? Upgrade your PS4 today by installing an SSD in an external enclosure.
Connect Enclosure to PS4 USB Port
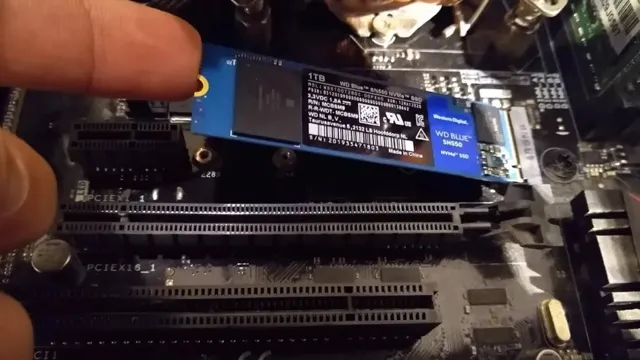
If you’re looking to upgrade your PS4’s storage capacity, installing an SSD is a great option. One thing you need to do is connect the enclosure to your PS4 USB port. To do this, first, make sure you have a compatible enclosure that supports SATA SSD drives.
Next, turn off your PS4 and unplug it from the power source. Connect the USB cable from the enclosure to one of the USB ports on the PS If your enclosure has an external power source, be sure to plug that into an outlet as well.
Once you have connected the enclosure to your PS4, you’re ready to install the SSD. Make sure to follow the manufacturer’s instructions carefully, as each enclosure may have slightly different directions. Generally, you will need to open the enclosure, slide in the SSD drive, and secure it in place with screws or other mounting hardware.
Once your SSD is securely installed in the enclosure, simply plug the enclosure back into the PS4 and turn it on. You should be able to see the new drive in your PS4’s storage settings. From there, you can format the drive and start using it for all your gaming needs.
With the increased speed and storage capacity of an SSD, you’ll be able to enjoy faster load times and smoother gameplay.
Format SSD in PS4
If you want to enhance your PS4 gaming experience, connecting an SSD to the console is one way to achieve it. However, before you hope to transfer games and data from your PS4 to the SSD, you should know how to format it properly. Fortunately, the process of formatting an SSD on a PS4 is straightforward.
First, ensure that the SSD you want to use is compatible with your PS Then, insert the SSD into the USB slot on the front of your console. From there, head to the settings menu, select ‘devices,’ then ‘USB storage devices.
’ Choose the SSD and select ‘format as extended storage.’ You’ll be provided with on-screen instructions to finalize the process. Once formatting is complete, your PS4 will start using the SSD as extended storage.
Keep in mind that once you format the SSD as extended storage, you cannot use it for any other purpose on other devices. By following these steps, you can easily connect and format an SSD to your PS
Go to PS4 Settings
If you’re looking to format your SSD in your PS4, the first thing you’ll need to do is head to the PS4 settings. This may seem like a daunting task, but it’s actually quite simple. Just turn on your PS4 and navigate to the settings menu.
Once you’re there, scroll down to the “Initialization” option and select it. From there, you’ll see an option to “Initialize PS” This is where you’ll be able to format your SSD.
It’s important to note, however, that formatting your SSD will erase everything stored on it. So, be sure to back up any important data before proceeding. Once you’re ready, select the “Full” option to completely wipe all data from the SSD.
This process may take some time, depending on the size of your SSD. Once it’s complete, your SSD will be formatted and ready to use with your PS Overall, formatting your SSD in your PS4 is a straightforward process that can be completed in just a few steps.
Select Devices
If you’re looking to format an SSD in your PS4, it’s important to make sure you have a compatible device. Not all SSDs are created equal, and some may not work with your PS It’s recommended to use an SSD with a capacity of at least 256 GB, and a read/write speed of at least 100MB/s.
When selecting a compatible SSD, look for brands such as Samsung, Western Digital, or Crucial that have been approved by Sony for use in the PS Once you have a compatible SSD, the formatting process is relatively simple. First, backup all of your data and save it to an external source.
Then, remove your old hard drive and install the new SSD. Finally, turn on your PS4 and follow the on-screen prompts to format the SSD and reinstall the operating system. With a newly formatted SSD, you’ll experience faster loading times and improved performance in your PS4 games and applications.
Select USB Storage Devices
If you’re looking to format an SSD in your PS4, it’s important to know which USB storage devices are compatible with the console. Not all external hard drives will work, and the ones that do need to meet certain specifications. The PS4 requires the use of USB
0 or later, with a minimum capacity of 250GB and a maximum capacity of 8TB. When selecting a USB storage device, make sure it’s formatted to either FAT32 or exFAT, as the PS4 won’t recognize NTFS or other file systems. Once you’ve selected a compatible USB drive, you can format your SSD by going to the console’s Settings menu and selecting “Devices,” followed by “USB Storage Devices.
” From there, you can select the drive you want to format and follow the on-screen instructions to complete the process. Remember that formatting a drive will erase all of its data, so make sure to back up any important files before proceeding. With these simple steps, you can easily format your SSD and get your PS4 ready for gaming.
Format SSD
Are you experiencing slow loading times or error messages on your PS4 due to a full SSD? The solution may be as simple as formatting your SSD. Formatting your SSD involves erasing all data and resetting it to its original state. Before starting, it’s important to backup your data and make sure you have a stable internet connection.
To format your SSD, start by going to the PS4 home screen, selecting “Settings”, then “Initialization”, and finally “Initialize PS4”. From here, select “Full” for the initialization type and follow the on-screen prompts to continue. Once the process is complete, your SSD will be wiped clean and ready for use.
Keep in mind that formatting your SSD will erase all data, so make sure to backup any important files before starting. By formatting your SSD, you can improve the performance of your PS4 and enjoy a smoother gaming experience.
Conclusion
In conclusion, connecting your SSD to your PS4 is a lot like plugging in headphones to your phone – it’s all about finding the right port and making sure everything is compatible. With a little bit of research and some careful maneuvering, you can easily upgrade your PS4’s storage capacity and enjoy faster load times and smoother gameplay. So don’t be afraid to dive into the world of SSDs – your PS4 (and your gaming experience) will thank you!”
FAQs
Can I connect an SSD to my PS4?
Yes, you can connect an SSD to your PS4 using a USB 3.0 external hard drive enclosure.
Will connecting an SSD to my PS4 improve the performance?
Yes, connecting an SSD to your PS4 can significantly improve the performance, as it reduces game load times and speeds up the overall system.
Is there any specific brand or type of SSD that is compatible with the PS4?
Not necessarily, you can use any brand or type of SSD as long as it is compatible with the USB 3.0 external hard drive enclosure.
Do I need to format my SSD before connecting it to the PS4?
Yes, you need to format your SSD using the FAT32 file format, which is compatible with the PS4 system.