
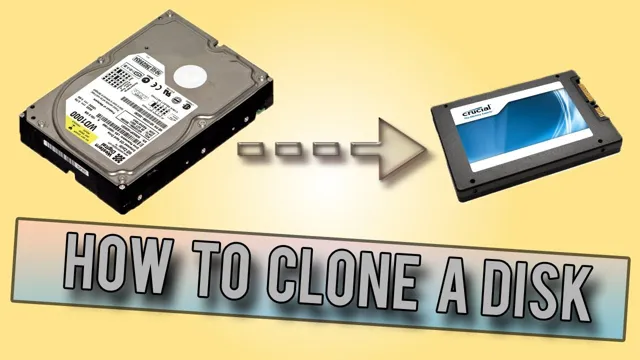
If you’re looking to upgrade your computer’s hard drive to an SSD, then you’re in for a treat! Switching from a traditional hard drive to a Solid State Drive (SSD) can significantly improve your computer’s performance, giving you a faster boot time, improved productivity, and even better gameplay. However, not everyone wants to start from scratch with a fresh operating system and all their programs newly-installed. This is where cloning your hard drive to an SSD comes in handy.
By cloning your hard drive, you can transfer all your data, settings, and applications to your new SSD, making the transition much smoother. But how exactly do you clone a hard drive to an SSD? Where do you start? Don’t worry; we’ve got you covered. In this guide, we’ll walk you through the process step-by-step, showing you how to clone your hard drive to an SSD and get the most out of your new drive.
So sit back, relax, and let’s dive in!
Choose the right SSD for your PC
If you’re looking to upgrade your PC’s performance, replacing your traditional hard drive with a solid-state drive (SSD) is a great place to start. But how do you transfer all of your data from the old hard drive to the new SSD? The process is called cloning, and it’s relatively simple. First, you’ll need to purchase a suitable cloning software, such as Acronis True Image or EaseUS Todo Backup.
Next, hook up the SSD to your computer (either externally or internally), and run the cloning software. The software will guide you through the process, which can take anywhere from a few minutes to a few hours depending on the size of your hard drive. Once the cloning is complete, shut down your computer, remove the old hard drive, and replace it with the new SSD.
When you turn your computer back on, it should boot up normally and all of your data and settings will be exactly as they were before. So, pick the right SSD for your PC and don’t wait any longer to upgrade!
Research SSDs for your computer’s make and model
When it comes to upgrading your computer’s storage, SSDs (solid-state drives) are a popular choice due to their faster read and write speeds compared to traditional hard disk drives (HDDs). However, choosing the right SSD for your PC can be a bit tricky. To start, research the make and model of your computer to ensure compatibility with the SSD you select.
Check if your PC supports SATA III or NVMe interfaces, as this will determine what kind of SSD you’re able to use. Additionally, consider the storage capacity you need, as well as your budget. Going for a higher capacity SSD may be more expensive, but can save you money in the long run by avoiding the need for future upgrades.
With some research and consideration, you can choose the right SSD for your PC and enjoy improved performance.
Determine the capacity you need
When it comes to choosing the right SSD for your PC, determining the capacity you need is crucial. This means taking into account your personal needs, such as how much storage space you require for your files, documents, games, and applications. It’s important to note that SSDs come with different storage capacities, ranging from as low as 128 GB to as high as 2 TB or more.
If you’re a gamer, graphic designer, or video editor, you might need a larger capacity SSD to accommodate large file sizes. However, if you’re only using your computer for basic tasks like browsing the internet or creating Word documents, a lower capacity SSD would suffice. Therefore, take the time to evaluate your needs before making a purchase.
By doing so, you’ll be able to choose an SSD that provides optimal performance for your computer.
Create a backup of your hard drive
If you’re looking to upgrade your hard drive to an SSD, it’s important to know how to clone your hard drive to ensure you don’t lose any of your data. One way to do this is by using software that can help clone your hard drive to your new SSD. There are different software options available, but one of the most popular and user-friendly is Macrium Reflect.
Simply download and install the software, connect your new SSD to your computer, and choose the option to clone your hard drive. It’s important to note that you’ll need a large enough SSD to hold all the data on your hard drive, including your operating system. Once the cloning process is finished, you can swap out your old hard drive for the new SSD and start up your computer as normal.
Not only will your data be safely backed up, but you’ll also enjoy faster startup times and improved performance with your new SSD.
Back up all important files to an external hard drive or cloud service
Backing up your files is crucial to ensure that you never lose important data. Creating a backup of your hard drive can be done through various methods such as using an external hard drive or cloud service. An external hard drive is a physical device that you can connect to your computer, and it acts as a separate storage space.
Similarly, cloud services such as Dropbox, Google Drive or iCloud offer online storage, where you upload your files and access them anywhere you have an internet connection. These methods not only provide a safety net in case of computer malfunctions or theft but also offer an easy way to transfer files between devices. It’s essential to schedule regular backups and check that they’re working correctly to ensure that you’ll always have access to your files.
Taking the time to create a backup can save you from future headaches and potential loss of valuable data.
Create a system image
Creating a system image of your hard drive is a crucial step in ensuring that your data and programs are backed up and protected in case of a system failure. By using a dependable backup tool, you can create a complete copy of your hard drive, including your operating system, settings, and applications. This backup method is invaluable, especially if you are dealing with a persistent computer problem, hard disk crash, or a virus attack.
Through this process, you can restore your system to its former state in exceptionally minimal time, resulting in less data loss and reduced downtime. Taking the time to create a system image can save you from unforeseen data loss and eliminate the stress of troubleshooting in times of computer errors and catastrophes. So, make creating a backup of your hard drive through a system image a top priority to secure your data and system’s accessibility.
Physically install the SSD into your computer
So, you’ve decided to upgrade your computer’s storage by cloning your hard drive to a new SSD. Congratulations! The first step is physically installing the SSD into your computer. Before anything else, make sure to turn off your computer and unplug it from the power source.
Then, open up your computer case and locate the hard drive bay. Gently remove the current hard drive and insert the new SSD in its place. Connect the necessary cables, secure the SSD, and close up your computer.
Once you’ve completed this, turn on your computer and make sure that the system can detect your new SSD. With the physical installation complete, you’re now ready to begin cloning your hard drive onto the new SSD.
Shut down and unplug your computer
Before you start installing your new SSD, make sure to shut down and unplug your computer to avoid any electrical damage or potential data loss. Once you’ve done that, it’s time to physically install the SSD into your computer. First, open up your computer case and locate the hard drive bay.
Most modern PC cases feature tool-less drive bays that don’t require any screws or tools to remove, but if yours does, make sure to unscrew the screws that hold the bay in place. Once you’ve removed the bay, carefully move the existing hard drive to the side, and pop in your new SSD. Make sure that it’s inserted firmly into the slot, and screw the bay back into place if necessary.
Finally, close up your case and boot up your computer. Congratulations, you’ve successfully installed your new SSD!
Remove old hard drive and install SSD using a mounting bracket
When upgrading your computer with a new SSD, you will need to physically install it into the designated space. Firstly, you should remove the old hard drive from your computer by opening up the case and locating the old hard drive. Be sure to unplug all cables that are connected to it and unscrew any screws holding it in place.
Once it’s removed, you will need to install the SSD utilizing a mounting bracket. A mounting bracket is a simple frame that the SSD fits into to ensure it stays in place. Secure the SSD onto the bracket with screws and slide it into the designated space in the computer case.
Lastly, screw it into place using the same screws from the old hard drive, and plug in the appropriate cables. The process may seem daunting, but it can be done by anyone with a little patience and the right equipment. With your new SSD installed, you can look forward to faster speeds and greater storage capacity for all your important files.
Use cloning software to clone your hard drive
If you’re looking to upgrade your computer’s storage capacity, transferring your data from an old hard drive to a new SSD doesn’t have to be a difficult task. One way to get this done is by cloning your hard drive. Cloning software is designed to create a complete copy of your hard drive, including all the files and operating system.
Once the cloning process is complete, you can simply remove the old hard drive and replace it with the new SSD and your computer will function as if nothing has changed. It’s important to note that your new SSD must have enough storage space to accommodate all your data. Using cloning software is an easy and quick method to transfer your data, saving you time and effort.
With this cloning process, you can upgrade your computer performance without having to reinstall your operating system or any software.
Choose a cloning software and download it
When it comes to cloning your hard drive, the first step is to choose the right cloning software for the job. There are plenty of options out there, such as EaseUS Todo Backup, Clonezilla, and Macrium Reflect. Each has its pros and cons, but all are designed to make the cloning process as simple and painless as possible.
Once you’ve selected your software, the next step is to download and install it on your computer. Make sure to choose a reputable source, such as the official website for the software, to avoid any potential issues with malware or viruses. Overall, using a cloning software is a great way to make a backup of your hard drive, protect your data, and transfer your files to a new computer.
By following the steps outlined in this article and choosing the right software for your needs, you can ensure a smooth and stress-free cloning experience. So, what are you waiting for? Give it a try and see the benefits for yourself!
Connect SSD to your PC using a SATA-to-USB cable or enclosure
If you want to speed up your aging computer, then upgrading to a solid-state drive (SSD) is a great move. To give your computer the boost it needs, you’ll need to connect the SSD to your PC using a SATA-to-USB cable or enclosure. These cables and enclosures make it easy to connect your new drive to your computer without having to install it internally.
Once you’ve done that, you’ll need to use cloning software to transfer the contents of your old hard drive to the new SSD. Cloning software allows you to create a complete copy of your existing hard drive, including the operating system, applications, and data, onto your new SSD. This process ensures that everything on your new drive is exactly the same as your old drive, and you won’t need to reinstall anything.
Some popular cloning software options include AOMEI Backupper, Macrium Reflect, and EaseUS Todo Backup. By cloning your old hard drive, you’ll get a faster and more reliable drive that will make your computer run faster than before. An SSD has no moving parts, which means it can read and write data faster than traditional hard drives.
This speed boost will be noticeable in almost every aspect of your computer usage, from boot times to loading applications and working with large files. Additionally, since the contents of your original drive are copied over exactly as they are, you won’t have to worry about losing any data or experiencing any compatibility issues with your existing applications. So, don’t hesitate to upgrade your computer with an SSD, using these simple steps, and enjoy faster and more efficient performance.
Open cloning software and follow prompts to clone hard drive to SSD
When upgrading to an SSD, one of the easiest ways to transfer your data is by using cloning software. This method makes an exact copy of your hard drive, including the operating system, programs, and files. Just open up the cloning software and follow the prompts to guide you through the process.
The software will identify your source and target drives and will give you options for customizing the transfer. Then, simply click start and wait for the cloning to finish. It’s important to note that some cloning software may only work with specific disk drives or have certain limitations, so be sure to do your research beforehand.
Once the cloning is complete, your new SSD should be a mirror image of your old hard drive, but with faster and more efficient performance. With this simple process, you can upgrade your system to an SSD without losing any data or having to reinstall your programs and operating system.
Swap old hard drive with new SSD
If you’re tired of slow boot times and sluggish performance from your old hard drive, upgrading to a new SSD can make all the difference. Fortunately, cloning your hard drive to an SSD is easier than you might think. First, you’ll need to connect your new SSD to your computer via a SATA cable or USB adapter.
Then, you can use a cloning software such as EaseUS Todo Backup or Acronis True Image to transfer all of your files and settings to the new drive. Once the cloning process is complete, you can swap out your old hard drive for the new SSD and start enjoying faster speeds and improved performance right away. Just be sure to backup all your files before starting the cloning process to avoid losing any important data.
Overall, upgrading to an SSD is a worthwhile investment that can breathe new life into an older computer.
Shut down and unplug your computer
Shut down and unplug your computer before you start swapping your old hard drive with a new SSD. This process involves opening your computer’s case, removing the old hard drive, and installing the new SSD. It’s crucial to ensure that you take the necessary precautions to avoid any damage to your computer or yourself.
Once you’ve safely opened your computer’s case, locate the old hard drive and unplug any cables attached to it. Carefully remove it from the slot and replace it with the new SSD, taking care to attach any necessary cables securely. This swap can provide a significant boost in performance, and with proper handling, it can be done without any issues.
A new SSD has faster read and write speeds, making it a reliable option for those who are tired of slow boot-up times and sluggish file transfer. So, make sure you shut down and unplug your computer before starting the SSD swap process to ensure a hassle-free upgrade.
Remove old hard drive and replace it with the new SSD
If you’re looking to speed up your computer’s performance, swapping out your old hard drive for a new solid-state drive (SSD) is a great place to start. The first step is to remove the old hard drive from your computer. Before you begin, make sure you have all the necessary tools and equipment, including a screwdriver and grounding strap to prevent static electricity from damaging your components.
Once you’ve opened up your computer’s case and removed the old hard drive, it’s time to install the new SSD. This involves attaching it to the mounting bracket in your computer’s case, connecting the power and data cables, and securing the drive in place with screws. Once everything is connected and securely fastened, you can close up your computer and power it on.
You should notice a significant improvement in speed and performance with your new SSD. So, if you’re tired of waiting for your computer to boot up or load applications, consider swapping out your old hard drive for a new SSD.
Restore backup onto the new SSD
If you’re looking to upgrade your hard drive to an SSD and wondering how to clone your data over, there are a few options available. The easiest way is to use a cloning tool such as Clonezilla or Macrium Reflect to create an exact copy of your existing hard drive on your new SSD. Once the cloning process is complete, you can simply restore your backup onto the new SSD.
Before proceeding with the cloning process, it’s important to ensure that your new SSD has enough capacity to accommodate all of your data from your old hard drive. Additionally, you may need to adjust the partition sizes to fit your new SSD. It’s always a good idea to back up your data before proceeding with any cloning or restoration process, as there is always a risk of data loss.
With a little patience and attention to detail, you can successfully clone your hard drive to an SSD and enjoy faster boot times and improved performance.
Connect external hard drive or cloud service to your PC
When upgrading to a new solid-state drive (SSD), it’s important to make sure all of your important files, documents, and programs are backed up and easily accessible. One of the best ways to do this is by connecting an external hard drive or cloud service to your PC. This allows you to backup all of your important data and files before making the switch to your new SSD.
Once your backup is complete, it’s time to restore it onto the new SSD. This process can be done using various software or tools provided by the manufacturer of the SSD. The keyword for this topic is “restore backup”.
It’s crucial to carefully follow the steps provided in the software to ensure a successful restoration of your important files and data. By following these steps, you can upgrade to a new SSD without the fear of losing your important data.
Restore all important files onto your new SSD
Restoring your important files onto your new SSD is a critical step in the migration process. Assuming you have a backup of your data on an external drive or cloud storage, all you need to do is connect it to your computer and follow the instructions to restore your files. It’s important to note that not all files need to be restored to the SSD as it’s always best to have them stored externally for safekeeping.
However, you should restore your crucial files such as documents, photos, and videos to the new SSD so that they are easily accessible and can benefit from faster load times. Some backup software has a simple drag-and-drop feature, while others require a more detailed restoration plan. Regardless of which software you use, make sure to double-check that everything is restored correctly and to save and organize your files on the new SSD in a way that makes sense to you.
By restoring your important files to your new SSD, you’ll have faster access to the files you need, and your computer will run more efficiently.
Final checks and optimizations
So you’ve decided to upgrade your hard drive to a solid-state drive (SSD), but you’re not quite sure how to clone your current hard drive over to the SSD? No need to worry – it’s a fairly straightforward process! Once you’ve chosen your preferred cloning software, you’ll want to double-check that you’ve selected all files and folders that you’ll need on your new SSD. This includes any hidden files or system files that may not be immediately visible but are crucial to your computer’s function. You’ll also want to make sure that your SSD is properly formatted before beginning the cloning process.
And once the cloning is complete, it’s a good idea to optimize your SSD for optimal speed and performance. This can include disabling unnecessary startup programs, cleaning out junk files and temporary files, and implementing any necessary firmware updates. By taking these final steps and making sure everything is in order, you’ll be able to enjoy the benefits of your new SSD to the fullest extent!
Run a disk cleanup or defragmentation
Now that you’ve gone through all the important steps to optimize your computer’s performance, there’s just one final check you can make to make sure it’s running smoothly. A disk cleanup or defragmentation can go a long way in keeping your computer running fast and efficiently. Over time, files and programs can become fragmented or cluttered, which can slow down your computer’s performance.
A disk cleanup will remove unnecessary files that are taking up space on your hard drive, while a defragmentation will reorganize fragmented files so that your computer can access them more quickly. This can help speed up your computer’s boot time and improve overall performance. Just make sure to do this regularly to ensure optimal performance.
Your computer will thank you for the TLC it deserves!
Check the BIOS boot order to ensure the SSD is the primary boot device
When upgrading your computer’s hardware, it’s important to ensure that the changes made are fully optimized and running correctly. One final check that should be made is to confirm that the SSD is set as the primary boot device in the BIOS boot order. This will ensure that your computer boots from the faster and more reliable SSD instead of a slower hard drive or other storage device.
Checking the BIOS boot order is a fairly simple process that can be done by accessing the BIOS settings on your computer. Once there, locate the boot order settings and move the SSD to the top of the list. This step will only take a few minutes but can make a noticeable difference in your computer’s overall speed and performance.
Don’t overlook this final check, as having a properly optimized computer can save you time and increase productivity in the long run.
Enjoy the increased speed and storage capacity of your newly cloned SSD
Congratulations, you have successfully cloned your SSD and all your data is now stored on a newer and faster storage drive. But before you start using it, there are a few final checks and optimizations that you need to perform. First, make sure that your BIOS recognizes the new drive and is set to boot from it.
If everything is working correctly, your computer should boot up faster and programs should load more quickly. Now that you have more storage on your computer, consider organizing your files and removing any unnecessary ones. This will not only make it easier to find what you need, but also free up space for future use.
You may also want to disable any programs that automatically start up with your computer, as they can slow down the boot process. Lastly, make sure that your operating system and all your programs are up to date to ensure maximum performance. Enjoy the increased speed and storage capacity of your newly cloned SSD, you’ve earned it!
Conclusion
In conclusion, cloning your hard drive to an SSD is like giving your computer a turbo boost. It’s a quick and simple way to ensure faster boot times, smoother operation, and increased performance. Whether you’re upgrading your trusty old PC or building a brand new one, cloning is the way to go.
So embrace the power of cloning and experience the thrill of a lightning-fast SSD today!”
FAQs
What equipment do I need to clone my hard drive to a SSD?
To clone your hard drive to a SSD, you will need a cloning software and a docking station to connect your hard drive and SSD to your computer.
Can I clone my hard drive to a smaller SSD?
Yes, you can clone your hard drive to a smaller SSD as long as the total data size of your hard drive doesn’t exceed the capacity of the SSD.
Do I need to format my new SSD before cloning my hard drive?
No, you don’t need to format your new SSD before cloning your hard drive. The cloning process will erase all the data on the SSD and replace it with the data from your hard drive.
How long does it take to clone a hard drive to a SSD?
The time it takes to clone a hard drive to a SSD depends on the size of the data on the hard drive and the speed of your computer. It can take anywhere from a few minutes to several hours.