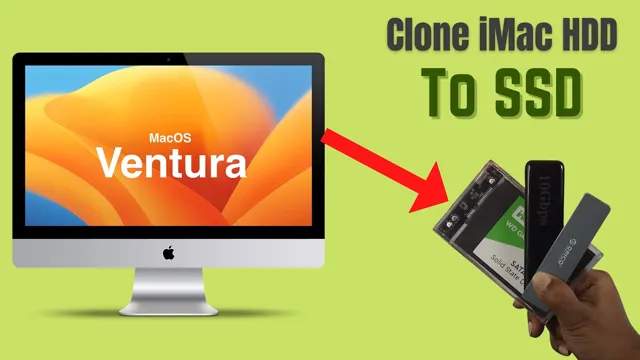
Do you feel like your iMac is starting to lag behind a bit? Maybe you’re not able to run the latest software updates or your computer just takes a while to start up. Well, fear not, there’s a solution that can speed up your iMac and give it a new lease on life. The answer is to replace your old hard drive with a snappy new SSD (solid-state drive).
But, you may be wondering, how do you transfer all your data from the old hard drive to the new one without losing anything? That’s where cloning comes in. In this tutorial, we’ll walk you through the process of cloning your iMac’s hard drive onto a new SSD, making your beloved iMac feel like new again.
Backup Your Data
If you’re looking to transfer all the data from your iMac’s HDD to an SSD, the best way to do it is by cloning your hard drive. Cloning makes an exact copy of your hard drive, including your operating system, settings, and files. This process is straightforward and will save you a lot of time and hassle of reinstalling everything on your new SSD.
To clone your iMac’s HDD, you will need a cloning software such as Carbon Copy Cloner or SuperDuper. These programs will guide you through the process of cloning your hard drive and transferring everything to your new SSD. Make sure to back up your data before the cloning process, as it can be risky and potentially delete your files if done incorrectly.
Cloning your iMac’s HDD to an SSD will significantly improve its performance, so it’s worth the effort if you’re looking to speed up your computer.
Use Time Machine or a Cloud Backup
Backing up your data is one of the most important things you can do to protect yourself from data loss. Two great options for backing up your data are time machine and cloud backups. Time machine is a built-in backup software available for Mac users, which automatically creates hourly, daily, and weekly backups of your entire system.
This means that if you accidentally delete a file or lose important data, you can easily restore it to a previous version. On the other hand, cloud backup services like Google Drive, Dropbox, or iCloud sync your data to their servers, ensuring that a copy of your important files is stored off-site and protected from potential disasters like theft or fire. Additionally, cloud backups make it easy to access your files from anywhere, allowing you to share documents with others or retrieve files when you’re away from your computer.
So whether you choose to use time machine or a cloud backup, make sure you’re backing up your data regularly to keep it safe and secure.
Prepare Your SSD
If you’re looking to upgrade your iMac’s speed, you might consider cloning your hard drive to an SSD. An SSD can offer much faster read and write speeds, leading to a significant performance boost in your computer. But before you begin the cloning process, you should prepare your SSD.
First, make sure your SSD has enough storage space to hold all of your data. Then, connect your SSD to your iMac using a Thunderbolt or USB cable. Next, format your SSD using Disk Utility.
Finally, make sure to enable TRIM, which helps maintain performance over time, by opening System Preferences, selecting “Security & Privacy,” and then selecting the “Advanced” tab. Once your SSD is prepared, you’re ready to start cloning your hard drive and enjoying a faster computer experience.
Format Your SSD for macOS
If you’ve recently purchased a new SSD for your Mac, the first step is to prepare it by formatting it for macOS. This process ensures that the drive is optimized for use with your Mac’s file system and operating system. To begin, connect the SSD to your Mac via a USB cable or an external enclosure.
Make sure your Mac is powered on and running the latest version of macOS. Then open Disk Utility, which can be found in the Utilities folder within your Applications folder. From here, you’ll be able to select your SSD and choose the macOS Extended (Journaled) format option.
Give your SSD a name and click “Erase” to begin the formatting process. It’s important to note that all data on the SSD will be permanently erased, so make sure to back up any important files before proceeding. Once the formatting is complete, your SSD will be ready for use with your Mac.
Create a Bootable Installer Drive
If you have recently upgraded to an SSD, it’s important to properly prepare it before installing the operating system. One essential step is to create a bootable installer drive to ensure a smooth installation process. The first thing you’ll need to do is download the operating system installer from the official website.
Once downloaded, you’ll need a USB drive with at least 8GB of space. Connect the USB drive to your computer and open Disk Utility. Select the USB drive and click on the Erase tab.
Choose the format as “Mac OS Extended (Journaled)” and give it a name. Click on Erase and wait for the process to complete. Now, open Terminal and enter the command “sudo /Applications/Install\ macOS\ Catalina.
app/Contents/Resources/createinstallmedia –volume /Volumes/USB –nointeraction”. This will create a bootable installer on your USB drive. By properly preparing your SSD with a bootable installer, you’ll have a hassle-free installation process for your operating system.
Clone Your iMac
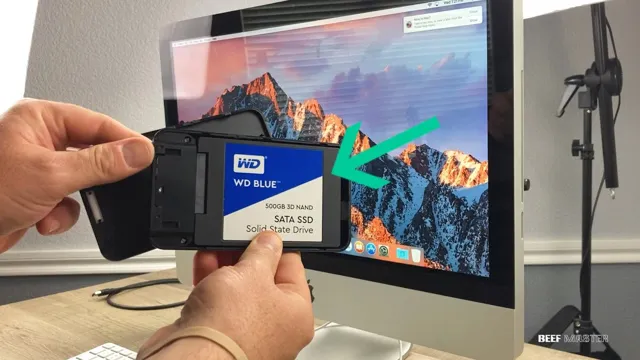
Are you looking to upgrade to a Solid State Drive (SSD) on your iMac but don’t want to lose your data? No worries, you can easily clone your iMac from your current hard disk drive (HDD) to the new SSD! The first step is to gather the necessary equipment, including the new SSD, an external enclosure for your HDD, and a cloning software program. Once you have everything, remove your HDD and install the SSD in its place. Then place your HDD in the external enclosure and connect it to your iMac.
Finally, use the cloning software to transfer the contents of your HDD to the SSD. This process will ensure that all your data, including your operating system and applications, are transferred seamlessly to your new SSD. With a cloned iMac, you can enjoy faster read/write speeds, increased performance, and more storage space.
So don’t hesitate to make the switch to an SSD today!
Connect Your SSD
If you’re looking to speed up your iMac’s performance, a great way to do it is by cloning your hard drive onto an SSD. Doing this will not only give you faster boot times but also increase the overall speed and responsiveness of your iMac. To start, you’ll need to connect your SSD to your iMac via a USB or Thunderbolt connection.
Once it’s connected, you’ll need to use cloning software like Carbon Copy Cloner or SuperDuper to clone your hard drive onto the SSD. This process can take several hours to complete, depending on the size of your hard drive. However, once it’s done, you can replace your old hard drive with the newly cloned SSD and enjoy faster performance from your iMac.
With this simple upgrade, you’ll be able to get more done with your iMac and enjoy a more efficient workflow. So, why not give it a try?
Access macOS Recovery Mode
If you want to clone your iMac, then the first step is to access the macOS Recovery Mode. This mode allows you to perform a variety of system-level tasks, including creating a backup of your entire hard drive. To access Recovery Mode, restart your iMac and hold down the Command + R keys until the Apple logo appears.
Once you’re in Recovery Mode, you can use the Disk Utility app to create a clone of your iMac’s hard drive. This backup will include all of your files, apps, and settings, and it can be used to restore your iMac if anything goes wrong. Just be sure to store your backup on an external hard drive or cloud storage service to ensure that it’s safe and easily accessible.
With this backup in place, you can rest assured that your iMac is protected in case of any unforeseen issues.
Use Disk Utility to Clone Your HDD
If you want to upgrade your iMac’s hard drive or make a backup copy of your files, cloning your hard drive is the perfect solution. Luckily, cloning your iMac’s hard drive is easy using the built-in Disk Utility tool on your Mac. Start by connecting your external hard drive to your iMac, and then launch Disk Utility from the Applications folder.
Next, select your iMac’s internal hard drive and click on the “Restore” tab. From there, select your external hard drive as the destination and then click on the “Restore” button. Disk Utility will then create a clone of your iMac’s hard drive on the selected external hard drive.
This process may take some time, depending on the size of your hard drive. Once the cloning process is complete, you can reboot your iMac using the external hard drive to make sure everything works correctly. Overall, cloning your iMac’s hard drive is a great way to upgrade or backup your files, and it’s easy to do using Disk Utility on your Mac.
Set Your SSD as the Startup Disk
Are you looking to upgrade your iMac’s speed and storage capacity by cloning the HDD to an SSD? You’re in the right place! One of the most essential steps is to set your SSD as the startup disk since your iMac will not recognize the clone as a startup disk. To do this, simply connect the SSD to your iMac using an external enclosure or adapter, and go to System Preferences> Startup Disk. Select the SSD and click Restart.
Once your iMac restarts, it will boot from the SSD. To clone your HDD to the SSD, you can use software like Carbon Copy Cloner or SuperDuper. Make sure to back up all your data and files before proceeding with the cloning process.
The cloning process may take some time depending on the size of your HDD, but after a successful clone, you’ll have a faster and more efficient iMac with a larger storage capacity. Overall, cloning an HDD to an SSD can be a game-changer for your iMac’s performance and is relatively simple to do with the right tools and software.
Restart Your iMac
If you’re looking to improve the boot-up time of your iMac, setting your SSD as the startup disk can do wonders. Luckily, it’s a simple process that can be done within minutes. To start, you’ll want to restart your iMac and hold down the Option key as it starts up.
This will bring up the Startup Manager, where you’ll be able to select the disk you want to use as the startup disk. Select your SSD and hit enter. From here, your iMac will always start up using your SSD, resulting in faster boot times and overall improved performance.
It’s important to note that you’ll want to keep your old startup disk to avoid losing any important data. With this quick and easy process, you’ll be able to see a noticeable difference in how quickly your iMac boots up.
Hold Down Option Key to Access Startup Manager
If you’re using a Mac with an SSD, it’s important to set it as the startup disk to ensure optimal performance. To do this, you’ll need to access the Startup Manager. Hold down the Option key as soon as you turn on your Mac to enter the Startup Manager.
From there, select your SSD as the startup disk and your Mac will automatically boot from it every time you start up. This will also prevent any unwanted delays, as the SSD is much faster than a traditional hard drive. With the SSD as the startup disk, you’ll notice a significant improvement in your Mac’s overall speed and performance.
So, give it a try and experience the benefits for yourself!
Select Your New SSD as the Startup Disk
When you install a new SSD for your computer, you may need to set it as the startup disk to ensure your system boots up from the newly installed drive. This means your computer will read the operating system and all the necessary files from your SSD, providing faster boot-up times and better overall performance. To set your SSD as the new startup disk, you’ll need to access your computer’s BIOS settings.
Depending on your computer, you may need to press a specific key during startup to access these settings. Once you’re in the BIOS menu, locate the boot order settings and move your SSD to the top of the list. This ensures your computer will look for the operating system on the SSD first before trying to read it from other drives.
Don’t forget to save your changes before you exit the BIOS settings. With your new SSD set as the startup disk, you’ll enjoy a much faster and more responsive computer.
Conclusion
In conclusion, cloning your iMac from HDD to SSD is like upgrading from a Pinto to a Tesla. You get to experience lightning-fast speeds, smoother performance, and improved overall functionality. And just like a Tesla, the cloning process may seem a bit complicated, but with the right tools and guidance, you can enjoy the ride in no time.
So put on your driving gloves and let’s get started on cloning your iMac to an SSD!”
FAQs
What is the benefit of cloning an iMac from HDD to SSD?
Cloning an iMac from HDD to SSD can improve its overall performance and speed. SSDs are faster than traditional HDDs, allowing for quicker boot-up times and faster app loading.
How do I clone my iMac from HDD to SSD?
You can clone your iMac from HDD to SSD by using software such as Carbon Copy Cloner or SuperDuper. Simply connect your SSD to your iMac, open the cloning software, and follow the step-by-step instructions provided.
Do I need any additional equipment to clone my iMac from HDD to SSD?
You will need a USB to SATA adapter to connect your SSD to your iMac. This adapter allows you to connect your SSD to your iMac via USB and transfer the data from your HDD to the SSD.
Can I clone my iMac from HDD to SSD without losing any data?
Yes, cloning your iMac from HDD to SSD allows you to transfer all your data, including your operating system, applications, and files, to the new SSD without losing any data.