
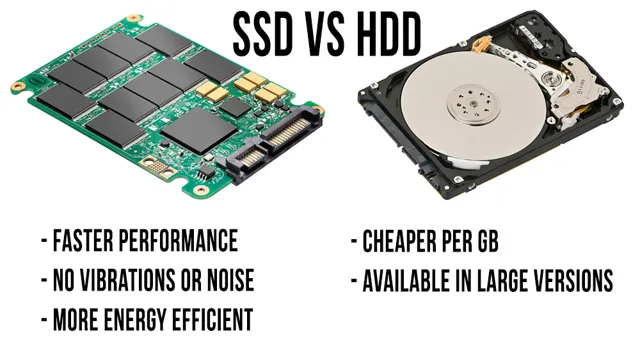
Are you fed up with your snail-paced computer? Do you want to boost the speed of your computer without having to buy a brand new one? Then, swapping out your HDD for an SSD could be the solution to your problems! Here’s a quick guide on how you can change your HDD to SSD and get a faster and smoother experience on your computer. An HDD (hard disk drive) is a traditional storage device that uses spinning platters and a mechanical arm to read and write data, while an SSD (solid-state drive) uses flash memory to store data. SSDs are faster, more durable, and less prone to failures than HDDs, making them a popular upgrade option for many computer users.
Switching from an HDD to SSD can be a great way to refresh an old computer, making it run much faster and smoother. If you’re considering upgrading, this guide will take you through the process step-by-step, from selecting the right SSD to copying your files and reinstalling your operating system. With this guide, you’ll learn everything you need to know about swapping out your old HDD for a new, faster SSD, and you’ll be able to do it all by yourself without seeking professional help.
Read on to find out how to switch from HDD to SSD in a few simple steps – your computer will thank you for it!
Determine Compatibility
If you’re looking to upgrade your computer’s storage system from an HDD to an SSD, the first thing you need to do is determine if your computer is compatible with an SSD. One easy way to do this is to check the specifications of your computer’s motherboard. Look for SATA ports, which are essential for connecting an SSD.
Most modern motherboards will have SATA III ports, which are necessary for achieving the maximum speed benefits of an SSD. Additionally, you should check the physical dimensions and mounting options of your computer’s hard drive. SSDs come in different sizes and form factors, so make sure you choose one that fits your computer’s specific requirements.
Overall, upgrading to an SSD is a great way to improve your computer’s speed and performance, but you’ll want to make sure you do your research and confirm compatibility before making the switch. So, how do I change my HDD to an SSD? By ensuring compatibility with your computer first and then physically swapping out your hard drive for the new SSD.
Check Your Laptop or Desktop
When it comes to upgrading your laptop or desktop, it’s crucial to first determine compatibility before making any purchases. While some components may seem like they will work with your device, there could be certain specifications or limitations that could cause issues. One way to check compatibility is to look up the specifications of your device, either through the manufacturer’s website or by looking at the manual that came with your device.
This will give you a detailed list of the components that your device can support. It’s also important to consider the space available in your device for any new components, as well as any power requirements they may have. By taking the time to check compatibility, you can avoid any potential compatibility issues and ensure that you get the most out of your device.
So before upgrading or purchasing any components, be sure to do your research and determine compatibility first.
Confirm SSD Specs
When it’s time to upgrade or replace your computer’s hard drive, it’s important to ensure that the new solid-state drive (SSD) is compatible with your system. To determine compatibility, it’s essential to check the SSD’s specifications. Start by looking at the form factor and interface of your current hard drive.
Most modern systems use the SATA (Serial ATA) interface, but some may require different types like NVMe or PCIe. Check your computer’s motherboard manual or contact the manufacturer if you’re unsure. The SSD’s storage capacity is another important factor to consider.
You don’t want to get an SSD that’s too small, as you might run out of storage quickly, but you also don’t want to overspend on storage that you don’t need. It’s essential to get the right balance. Finally, pay attention to the SSD’s read and write speeds, which are essential for fast and efficient performance.
With these factors considered, you can select the perfect SSD that meets your needs and ensures compatibility with your computer system.
Prepare for the Upgrade
If you’re tired of your computer running slow or just need more storage, upgrading your HDD to a SSD may be the answer. Before you begin, it’s important to back up all your important files to an external drive. Once you have them safe, you can turn off your computer and unplug it.
Open it up and locate the HDD by removing the panel or the cover. Remove the power and data cables that are connected to the HDD and carefully take it out of its slot. Next, install the SSD in the same slot and connect the necessary cables.
Lastly, turn on your computer and check if the SSD is detected by the system. If it is, go ahead and install your operating system and software on the SSD. By following these steps, you can easily change your HDD to a SSD and give your computer a new lease on life.
Back Up Your Data
Before upgrading your technology, it’s crucial to back up your data. This may seem like a hassle, but trust me, it’s much better than losing all your important files and documents! There are a variety of ways to back up your data, such as using an external hard drive or backing up to the cloud. Personally, I like to use both methods just in case one fails.
It’s also important to make sure you’re backing up everything, not just specific folders or files. Take the time to review all your data, including photos, music, and documents, and make sure everything is accounted for. By taking these steps to prepare for the upgrade, you can have peace of mind knowing your data is safe and secure.
Gather the Necessary Tools
When it comes to upgrading your system, it is important to gather all the necessary tools beforehand. This includes checking the compatibility of your new hardware with your existing system, acquiring the appropriate cables and connectors, and ensuring you have the necessary software and drivers. It’s also crucial to have the right physical tools, such as a screwdriver set and antistatic wrist strap, to avoid damaging your equipment.
Before starting the upgrade process, you should take the time to familiarize yourself with each tool and its purpose to ensure a smooth and successful upgrade. Remember, a little preparation can go a long way in making the upgrade process hassle-free.
Shutdown Your Device
If you’re planning to upgrade your device, the first step is to shut it down properly. This may seem like a no-brainer, but it’s important to remember that simply pressing the power button may not be enough. Depending on your device’s operating system, there may be a specific process for shutting down that ensures all open applications and processes are properly closed before power is cut to the device.
It’s also a good idea to backup any important data on the device before shutting it down, just in case something goes wrong during the upgrade process. By properly shutting down your device, you can ensure that the upgrade goes as smoothly as possible and minimize the risk of any data loss or other issues.
Replace HDD with SSD
If you’re looking to switch out your old HDD with a brand new SSD, there are a few things you’ll need to keep in mind. First and foremost, it’s important to backup any important data or files before making any changes to your computer’s hardware. Once you’ve done this, you can begin the process of physically swapping out the old HDD for the new SSD.
Make sure to turn off your computer and unplug it from any electrical outlets before opening it up. You’ll then need to locate the hard drive bay and unscrew it from your computer’s housing. Carefully remove the old HDD and replace it with the new SSD, making sure to connect any necessary cables and screws.
Once everything is securely in place, you can power up your computer and begin the transfer of data from your backup to your new SSD. With a bit of patience and attention to detail, switching out your HDD for an SSD can greatly improve the speed and performance of your computer.
Open the Case
If you’re looking to give your computer a speed boost, swapping out your HDD for an SSD is a great way to go. To replace your hard drive with an SSD, you’ll first need to open up your computer case. Make sure to turn off your computer and disconnect any power cables before doing so.
Once your case is open, locate your hard drive and disconnect any cables or screws holding it in place. Gently remove the HDD and set it aside. Next, insert your new SSD into the same slot and secure it with the necessary cables and screws.
Finally, turn your computer back on and make sure everything is running smoothly. With your newly installed SSD, you should see significantly faster boot times and quicker file transfers. Don’t let a sluggish hard drive slow you down any longer – upgrade to an SSD today!
Remove the HDD
Replacing a traditional hard drive with a solid-state drive (SSD) is a great way to improve your computer’s performance. If you’re looking to make the switch, the first step is to remove the old HDD from your machine. To do so, you’ll need to first power down your computer and disconnect any cables or peripherals.
Open up the case and locate the HDD, which is typically mounted on a bracket or secured with screws. Carefully remove the screws or release the bracket, taking care not to damage the surrounding components. Once the HDD is free, gently disconnect the data and power cables, being sure to free any retaining clips or tabs.
With the old HDD removed, you can now install your new SSD in its place, using the same cables and mounting hardware. By swapping out your HDD for an SSD, you can enjoy faster boot times, quicker application launches, and improved overall system responsiveness.
Install the SSD
If you want to improve your computer’s performance, replacing the HDD with an SSD is a great way to do it. Installing an SSD is fairly easy and doesn’t require any advanced technical knowledge. First, you need to purchase an SSD that is compatible with your computer.
Once you have the SSD, remove the back cover of your laptop and locate the hard drive. Depending on your laptop model, you may need to unscrew a few screws or remove the battery to access the hard drive. Carefully disconnect the hard drive and remove it from the laptop.
Next, slide the SSD into the same spot where the hard drive was located. You may need to reinstall the screws or battery if you had to remove them. Finally, boot up your computer and go into the BIOS to check if your computer recognizes the new SSD.
If it does, you’re good to go! Your computer will now be much faster and more responsive, allowing you to get more done in less time. Remember to back up your data before replacing your hard drive to avoid losing any important files.
Reassemble and Boot Up
So, you’ve decided to upgrade your computer’s hard drive to a speedy and efficient SSD – good call! Now, let’s walk through the steps to physically make the switch. Once you have your new SSD ready to go, power down your computer and disconnect all cables. Remove the cover of your computer case and locate the hard drive bay.
You will need to unscrew the mounting bracket of the old HDD and remove it from the bay. Insert the new SSD into the same bay and secure it with the same screws. Reconnect any cables that were disconnected and replace the cover.
Once your computer is reassembled, it’s time to boot up! Turn on your computer and press the key to enter the BIOS settings, usually F2 or Delete. Within the BIOS, set the new SSD as the primary boot device and save your changes. With the new SSD now the primary boot device, restart your computer one final time and you should be good to go! Enjoy your lightning-fast new SSD.
Put Everything Back Together
Once you’ve finished troubleshooting and fixing any issues with your computer, it’s time to put everything back together and get it up and running again. Start by reattaching any cables or wires that you may have disconnected during the process. Double-check that everything is properly connected before moving on to the next step.
Then, carefully place the side panel back onto the computer case and secure it with the screws you removed earlier. Finally, it’s time to boot up your computer and make sure everything is working smoothly. Power on your computer and make sure you don’t encounter any error messages or issues during the startup process.
If everything looks good, it’s time to celebrate! Your computer is now fully functional and ready to use once again. Remember to keep up with regular maintenance to avoid any future issues.
Power On and Boot Up
After disassembling and cleaning your computer parts, the next step is to reassemble and boot it up. Before proceeding, ensure that all components are firmly and correctly connected to their respective slots. Once you’re done, hit the power button to turn it on and wait for it to boot up.
A series of checks and tests will be conducted, and you will see them go by on your screen. If everything goes well, you’ll soon be greeted with your computer’s home screen. In case there are any issues during the boot-up process, an error message will appear on the screen, signaling a problem with a particular component.
A tip to keep in mind here is to remain patient, as the process might take a little longer than usual, depending on the computer’s age and hardware. So, grab a cup of coffee and wait for your computer to fully boot up.
Final Steps and Tips
So, you’ve decided to upgrade your old hard disk drive to a faster and more reliable solid state drive? Congrats, you’re about to experience a major improvement in your computer’s performance! Before you dive into the process, make sure to backup all important files and data onto a separate device or cloud storage. Once you’re ready, open up your computer’s case and locate the HDD bay. Carefully remove the old HDD and replace it with your new SSD, making sure it’s securely fastened.
You’ll need to install a fresh operating system on your new drive, so have your Windows or Mac OS installation file ready. Follow the installation prompts and make sure your new SSD is properly formatted. Finally, install your apps and programs onto your new drive and enjoy lightning-fast speed! Remember, changing your HDD to an SSD might seem daunting, but with proper preparations and this step-by-step guide, you’re well on your way to a smoother, faster computing experience.
Reinstall Your OS
As you prepare to reinstall your operating system, there are a few final steps and tips to keep in mind. First, be sure to back up all of your important files and documents to an external hard drive or cloud storage service. This will ensure that nothing is lost during the installation process.
Next, make sure you have a copy of your operating system on a USB drive or DVD. You will need this to install the OS on your computer. Once you have backed up your files and have your OS installation media ready, it’s time to begin the installation process.
Follow the on-screen prompts and be patient, as the installation can take some time. Once the installation is complete, make sure to install any necessary updates and drivers for your computer’s hardware. Finally, take the time to customize your settings and install any necessary software or programs.
These final steps will ensure that your newly installed OS is running smoothly and ready for use.
Configure Your Settings
After setting up your account, the next step is to configure your settings. This will ensure that you have control over how your profile looks, what notifications you receive, and who can see your content. One important setting to check is your privacy settings, which allow you to choose who sees your posts, and who can follow you.
Additionally, you can enable two-factor authentication to enhance your account’s security. It’s also a good idea to customize your notifications, so you get alerts for what’s important, and not for every little thing. When it comes to choosing your display name and profile picture, make sure they’re professional and represent the image you want to convey.
Lastly, take some time to explore the app and familiarize yourself with all the features it has to offer. By doing so, you’ll be able to make the most of your experience.
Optimize Your New SSD
If you’ve recently upgraded to an SSD, you’re probably already enjoying lightning-fast boot times and increased application speed. However, there are a few final steps that you can take to optimize your new drive further. The first step is to ensure that your firmware is up to date.
Manufacturers regularly release firmware updates to improve performance and fix any bugs. Check the manufacturer’s website to see if there’s an update available for your drive. Another important consideration is your operating system’s power settings, which should be optimized for an SSD.
Power settings can significantly affect performance, so make sure you’re using the right settings. Finally, remember that your SSD has a limited number of writes and erases, so it’s essential to minimize unnecessary writes. You can reduce writes by disabling hibernation, moving your paging file to a different drive, and avoiding defragmentation.
By following these simple steps, you can maximize the performance and longevity of your new SSD.
Conclusion
Changing your HDD to an SSD is like swapping out a tired old horse with a sleek, speedy stallion. By upgrading your storage to an SSD, you’ll experience lightning-fast load times and a smoother computing experience overall. Don’t settle for sluggish performance when you can give your system the boost it deserves with this simple hardware upgrade.
So, saddle up and switch to an SSD – your computer (and your sanity) will thank you!”
FAQs
Why should I upgrade my HDD to an SSD?
An SSD is much faster than an HDD, meaning faster boot times, faster application launch times, and faster file transfer speeds. It can also improve overall system performance and responsiveness.
Do I need to reinstall my operating system when upgrading to an SSD?
It is recommended to reinstall the operating system on your new SSD, as it will ensure optimal performance. However, you can also clone your existing hard drive onto the SSD using specialized software.
Are all SSDs compatible with my computer?
You will need to check if your computer supports the interface and form factor of the SSD you want to install. For example, if your computer only supports SATA III, you can’t install an NVMe SSD.
How much storage space do I need on an SSD?
It depends on your usage and storage needs, but most people find 256GB or 512GB to be sufficient. If you have a large media collection or regularly work with large files, you may need more storage.