If you’re the proud owner of a Mac but find that it’s running sluggishly, then you might be wondering how you can solve the problem. One of the best solutions is to upgrade your Mac to an SSD. Not only will you notice a significant boost in speed, but your Mac will also be more reliable and efficient.
But with so many options out there, it’s easy to feel overwhelmed by the prospect of finding the perfect SSD for your Mac. In this blog post, we’ll guide you through the process of upgrading your Mac, offering tips and advice on how to choose the best SSD for your needs. So let’s dive in and explore how you can take your Mac to the next level!
Why Upgrade to SSD?
If you’re looking to boost the performance of your Mac, upgrading to an SSD is one of the best options available. SSDs, or solid state drives, are faster and more reliable than traditional hard drives. They have no moving parts, which means they are less likely to fail or break down over time.
Since there are no spinning disks, they can also read and write data much faster than traditional hard drives. So, how can you upgrade your Mac to an SSD? You can either take it to a professional or do it yourself with a little bit of research. Most Macs will have a slot for an SSD, so you can simply remove the old hard drive and replace it with the new one.
After the installation, you’ll notice a significant improvement in the speed and performance of your Mac. In conclusion, upgrading to an SSD is a great way to improve your Mac’s performance, and it’s relatively easy to do with the right tools and knowledge.
Improved Performance and Speed
If you’re still using a traditional hard drive in your computer, you might be missing out on some incredible speed and performance gains by upgrading to a solid-state drive (SSD). One of the primary benefits of SSDs is their faster read and write speeds compared to traditional hard drives. This means that your computer can boot up faster, and programs and files can load more quickly.
This is because SSDs have no moving parts, making them less prone to failure or slowdowns caused by mechanical failure. So, if you’re looking for a simple and highly effective way to give your computer a much-needed performance boost, upgrading to an SSD can significantly improve your overall computing experience. Don’t let your computing speed be bottlenecked by outdated hardware– upgrade to an SSD keyword today and feel the difference firsthand.
Increased Storage Capacity
If you’re looking for increased storage capacity, upgrading to an SSD (solid-state drive) is the way to go. Unlike traditional hard drives, SSDs do not have any moving parts, which means they’re much faster, quieter, and more reliable. Plus, they can hold much more data than a traditional hard drive.
This is because SSDs use NAND flash memory to store data, which allows for much greater storage capacity. In fact, some SSDs can hold terabytes of data, which is a huge amount by any standard. So, if you’re tired of running out of storage space on your computer or other devices, upgrading to an SSD is a smart move.
Not only will you have more space to store all your important files and documents, but you’ll also enjoy faster performance and improved overall efficiency. So, what are you waiting for? Upgrade to an SSD today and start enjoying the benefits of increased storage capacity!
Determining Compatibility
If you’re thinking about upgrading your Mac to an SSD, the first thing you need to do is determine whether your computer is compatible with this type of storage. Luckily, most modern Macs are able to use an SSD, so it’s likely that your computer can handle the upgrade. You’ll want to check your computer’s specifications to be sure.
One way to do this is to go to the Apple Menu in the top-left corner of your screen, select About This Mac, and then click on the Storage tab. This will give you information about your current storage setup, including the type of drive you’re using and the amount of space available. If you see the word “Solid State” in the information, then you’re good to go! If not, you may need to do some further research to determine whether your Mac can accommodate an SSD upgrade.
Once you’ve determined compatibility, you can start looking for the right SSD to upgrade your Mac and enjoy faster speeds and increased performance.
Check Mac Model and Year
When it comes to determining the compatibility of a Mac model and year, there are a few things you should keep in mind. First off, you’ll want to check which version of macOS your Mac can run. This can typically be found in the system requirements for each version of macOS.
You’ll also want to check the specs of your Mac to ensure it meets the minimum requirements for the version of macOS you want to upgrade to. This includes things like the amount of RAM and storage space your Mac has. Another thing to consider is whether or not your Mac has any compatibility issues with certain software or hardware.
For example, some older Macs may not be able to run the latest version of Adobe Creative Suite or connect to newer peripherals like Thunderbolt 3 devices. By doing your research and checking your Mac’s model and year, you can ensure that you’re getting the most out of your device and avoiding any compatibility issues.
Check SSD Compatibility
When looking to upgrade your computer’s storage, one of the primary considerations is compatibility. Not all SSDs (solid-state drives) are created equal, and some may not be compatible with your specific PC. The first step in determining compatibility is to check your PC’s interface type.
Most modern motherboards have SATA or PCIe interfaces, so it’s important to ensure that your chosen SSD matches the interface type. Additionally, you should also check your PC’s available storage bays and ensure that your SSD will physically fit into the space. If you’re unsure about the compatibility of a particular SSD with your PC, it’s always best to consult with a professional or do further research to avoid any potential issues.
By taking the time to determine compatibility beforehand, you can ensure a smooth and successful upgrade process.
Selecting the Right SSD
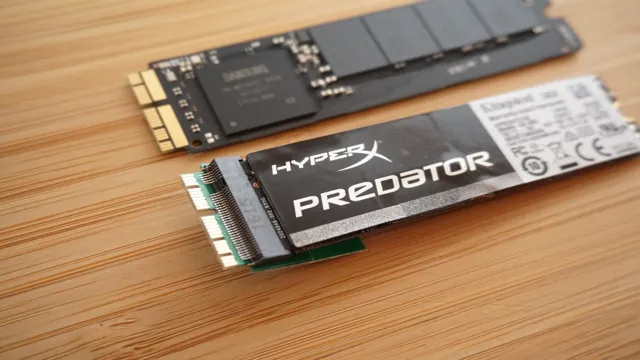
If you’re wondering how to upgrade your Mac to an SSD, you’ve come to the right place. Choosing the right SSD for your Mac is crucial in ensuring optimal performance and efficiency. The first thing you need to do is determine what type of SSD your Mac requires, whether it’s PCIe, SATA, or NVMe.
You can check this by going to the “About This Mac” menu and clicking on “System Report.” From there, you can see your Mac’s model and specifications, including the type of SSD it uses. After determining the type of SSD you need, you should consider the storage capacity you require.
It’s recommended to get an SSD with at least 256GB of storage to ensure enough space for your files and programs. You should also look at the speed of the SSD, as faster speeds result in quicker boot times and file transfers. Ultimately, selecting the right SSD for your Mac can significantly improve its performance and provide a better user experience.
Consider Storage Capacity and Price
When it comes to selecting the right SSD, one important factor to consider is storage capacity and price. SSDs are generally more expensive than traditional hard drives, so it’s crucial to determine how much storage you really need and what you are willing to pay for it. If you only need a few hundred gigabytes for basic tasks like browsing the web and streaming content, a lower- capacity SSD could be sufficient and more cost-effective.
However, if you require more space for activities like heavy gaming, video editing, or running multiple applications simultaneously, you may need to opt for a larger capacity SSD, which typically carries a higher price tag. Keep in mind that it’s always better to have extra storage than not enough, so consider your future needs when deciding on the right SSD for you.
Read Reviews and Compare Brands
When it comes to choosing the right SSD for your needs, it’s important to do your research and compare brands to find the best fit. Reading reviews from other users can be incredibly helpful in understanding the pros and cons of different options. Additionally, your specific needs will determine which features are most important to you, such as storage capacity, speed, durability, and cost.
It’s important to not just focus on the brand name, but to look at the specific model and its performance. Don’t be afraid to ask questions and seek out recommendations from experts or trusted sources. With some careful consideration and research, you can find the perfect SSD to meet your needs and enhance your computer’s performance.
Installing Your New SSD
If you’re looking to upgrade your Mac to an SSD, the process is simpler than you might think. First, make sure your Mac is compatible with the SSD you want to install. You can check this information on the manufacturer’s website.
Next, back up your important data before opening up your Mac. Once you have the SSD, you’ll need to remove the old hard drive and install the new one. There are plenty of tutorials online that can help guide you through this process.
Once the installation is complete, you’ll need to transfer your data from the backup to the new SSD. Then, you can enjoy your upgraded Mac with faster performance and improved storage. Just remember to dispose of your old hard drive properly.
With these steps, upgrading your Mac to an SSD can be a smooth and rewarding experience.
Back Up Your Data
If you’re installing a new SSD, one essential step is to back up your data first. Losing important files and documents can be a huge headache, so taking the time to store them before starting the installation process is crucial. You could use an external hard drive, cloud storage, or even a trustworthy flash drive to make a copy of your data.
Once you’re certain everything has been properly backed up, you can move forward with installing your new SSD. Remember, taking the time to back up your data may take a few extra minutes, but it can save you hours of frustration if something goes wrong during the installation process. So make sure to take those extra few steps and protect your important files.
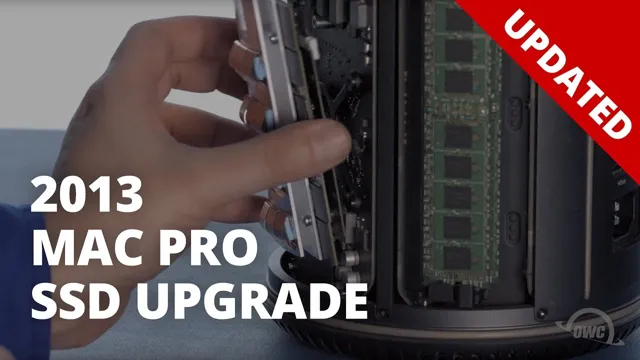
Open Your Mac and Remove Old Hard Drive
If you want to speed up your Mac, one way to do it is by installing a new SSD. But before you can install the new SSD, you have to open your Mac and remove the old hard drive. This might seem intimidating, but with the right tools and precautions, it’s doable even if you’re not a computer expert.
First, make sure you have a clean, well-lit workspace and all the necessary tools, such as a screwdriver set and a spudger. Then, shut down your Mac and unplug it from the power source. Carefully remove the screws that hold the bottom case in place and lift the case off.
You should be able to see the old hard drive and its cable. Disconnect the cable and remove the screws that hold the drive in place. Take out the old drive and replace it with the new SSD, being careful not to touch the circuit board or connectors.
Put everything back together and turn on your Mac to see the difference in speed and performance. With a few simple steps, you can upgrade your Mac and enjoy faster operating speeds that make a difference in your day-to-day activities.
Install the New SSD and Reassemble Your Mac
Now that you have your new SSD in hand, it’s time to install it in your Mac. First, shut down your Mac and unplug any cables or external devices from it. Then, remove the screws that hold the bottom cover in place, and carefully lift off the cover.
Locate the existing hard drive and disconnect it from the motherboard by sliding it out of its connector. Now, slide your new SSD into the same connector, being careful to align it correctly. Finally, reattach the bottom cover of your Mac and tighten the screws.
Congratulations, you’ve successfully installed your new SSD! With the faster read and write speeds of your new drive, you’ll notice a significant improvement in your Mac’s performance.
Conclusion
Upgrading your Mac to an SSD is like giving it a turbo boost. You’ll experience lightning-fast speeds, improved performance, and smoother multitasking. Plus, you’ll no longer have to deal with the spinning beach ball of death.
So say goodbye to sluggishness and hello to a powerful and efficient machine!”
FAQs
What are the benefits of upgrading my Mac to an SSD?
Upgrading your Mac to an SSD can significantly improve its speed and performance. It can also increase the storage capacity, reduce power consumption, and make your Mac more reliable.
Is it possible to upgrade my Mac to an SSD by myself?
Yes, it is possible to upgrade your Mac to an SSD by yourself. However, it requires some technical skills and knowledge. It is recommended to take the help of a professional or follow the instructions carefully to avoid any damage to your Mac.
What are the things I need to consider before upgrading my Mac to an SSD?
Before upgrading your Mac to an SSD, you need to consider the compatibility of the SSD with your Mac, storage capacity, budget, and technical skills. You should also back up your important data and have the necessary tools and software ready before starting the upgrade process.
How can I transfer my data from the old hard drive to the new SSD?
There are several ways to transfer data from the old hard drive to the new SSD, such as using Time Machine, Carbon Copy Cloner, or Migration Assistant. You can also manually copy the files and folders to the new SSD. It is recommended to back up your data before transferring it to avoid any loss of data.