
Are you having trouble recognizing a crucial SSD in your Windows 10 PC? Fear not, as we have the solution for you. With the increasing use of Solid State Drives, it’s essential to ensure that they are correctly detected and configured on your computer. Having an unrecognized SSD can lead to data loss, decreased performance, and even system crashes.
Think of your SSD as the engine that powers your computer. Without it, your computer won’t function correctly, and it won’t be able to perform at its best. Your SSD is responsible for storing important files and applications, and ensuring that they are quickly accessible when you need them.
Therefore, it’s crucial to ensure that your SSD is correctly recognized in Windows In this blog, we’ll explore different methods of recognizing a crucial SSD in Windows We’ll explain how to check if your SSD is correctly detected by your computer, and how to fix any issues that may be preventing it from being recognized.
By following these steps, you can ensure that your SSD is functioning correctly, and that your computer is performing at its best. So, let’s get started and ensure that your crucial SSD is recognized in Windows
Checking Device Manager
When you add a Crucial SSD to your Windows 10 computer, you may notice that it isn’t being recognized right away. One of the first things you’ll want to do is check the Device Manager to see if it’s listed there. To access the Device Manager, simply right-click on the Start menu and select “Device Manager”.
If your Crucial SSD is listed under “Disk Drives”, you’re good to go! If it isn’t listed, you may need to update the device drivers. You can do this by right-clicking on the Crucial SSD in Device Manager and selecting “Update Driver Software”. Windows will then search for updated drivers for your SSD.
Once you’ve updated your drivers, your Crucial SSD should be recognized without any issues. So if you’re experiencing difficulty with recognizing your Crucial SSD on Windows 10, don’t fret! By following these simple steps, you’ll be able to get up and running in no time.
Open Start Menu > Type Device Manager > Open Device Manager
Device Manager If you’re having trouble with a device on your computer, checking the Device Manager is a great place to start. To access it, simply open up your Start Menu and type in “Device Manager”. Once you’ve opened it up, you’ll be presented with a list of all the devices that are currently connected to your computer.
This list includes everything from your keyboard and mouse to your graphics card and network adapters. If you see a device with a yellow exclamation mark next to it, that means there’s an issue with it. You can right-click on the device and select “Properties” to get more information about what the problem is.
From there, you can try updating the device driver, uninstalling and reinstalling the device, or even replacing it if necessary. Checking the Device Manager can also be helpful if you’re looking to troubleshoot a performance issue on your computer. For example, if you’re experiencing slow internet speeds, you can check the Network Adapters section of the Device Manager to see if there are any issues there.
You might find that a driver needs to be updated or that there’s an issue with your wireless network card. In summary, if you’re having trouble with a device on your computer or are experiencing performance issues, checking the Device Manager is a great place to start. It gives you a detailed list of all the devices and drivers on your system and can help you pinpoint any issues that might be causing trouble.
Expand Disk Drives > Check for Crucial SSD
If you’re looking to upgrade your computer’s hard drive to a faster and more efficient solid-state drive (SSD), checking the Device Manager is an important first step. Once you’ve accessed the Device Manager, expand the Disk Drives option to see if your computer already has a Crucial SSD installed. If you don’t see one, you can purchase and install one yourself.
A Crucial SSD is a great choice, as it can provide faster data transfer speeds and improved performance for your computer. Installing a new SSD can be a bit daunting, but there are plenty of resources online to guide you through the process. With a little bit of patience and know-how, you can upgrade your computer and enjoy faster load times and improved overall performance.
Accessing Disk Management
If you’re struggling to recognize your Crucial SSD in Windows 10, one of the first places to check is Disk Management. This built-in utility can help you view all the connected drives on your system, including your SSD. To access it, simply right-click the Windows start button and select “Disk Management” from the menu.
You should then see a list of all the drives connected to your computer, which will allow you to identify your Crucial SSD. If you can see the drive listed, but it doesn’t appear correctly labeled, you may need to assign it a letter or format it. Alternatively, if you can’t see the drive listed at all, it may be a hardware issue and you should seek support from Crucial or your computer manufacturer.
Overall, using Disk Management is an easy and effective way to troubleshoot issues with recognizing your Crucial SSD in Windows
Open Start Menu > Type Disk Management > Open Disk Management
When it comes to managing your computer’s storage, Disk Management is an essential tool that helps you organize and manage your disk partitions and volumes. To access Disk Management in Windows 10, you need to head to the Start Menu and type “Disk Management” in the search bar. Once you see the app, click on it to open Disk Management.
This tool will display all the partitions and volumes present on your computer’s disk. You can use Disk Management to create, delete, format, and resize partitions; change a drive letter; and assign a mount point to a volume. It’s essential to keep track of your computer’s disk and storage use, and Disk Management makes it easy to do so.
With just a few clicks, you can manage your computer’s storage and ensure that everything is working correctly. So, whether you’re looking to create a new partition or check on your disk space usage, Disk Management is an essential tool to have.
Find Crucial SSD > Check Drive Letter and File System
If you’re looking to upgrade your computer’s storage with a new Crucial SSD, one of the first things you’ll need to do is check the drive letter and file system to ensure it’s compatible with your system. To do this, you’ll need to access Disk Management. This tool can be accessed by right-clicking on the Windows start button and selecting “Disk Management” from the pop-up menu.
In Disk Management, you’ll be able to see all of the disk drives currently connected to your computer, including your new SSD. From here, you can check the drive letter and file system, and format the drive if necessary. Keep in mind that formatting a drive will erase all data on the drive, so it’s crucial to backup important files before doing so.
By accessing Disk Management, you can ensure that your new Crucial SSD is properly configured and ready to use.
Using Command Prompt
If you’re using a Crucial SSD and having trouble getting it recognized by Windows 10, using Command Prompt can be a helpful solution. Command Prompt allows you to access the Windows Management Instrumentation Command-line (WMIC), which can help identify and troubleshoot any issues with your SSD. To begin, open Command Prompt as an administrator and type “WMIC DiskDrive List Brief” to view a list of all connected drives.
Look for your Crucial SSD and make note of the device ID. Then, type “WMIC PARTITION List DiskIndex=0” (replace “0” with the index number of your device) and find the disk ID for your SSD’s partition. Finally, type “WMIC DiskDrive where DeviceID=’your device ID’ set status=disabled” and “WMIC PARTITION where DiskIndex=’your disk ID’ set type=extended” to disable and re-enable your SSD, respectively.
Hopefully, these steps will help your Crucial SSD become recognized by Windows
Open Start Menu > Type CMD > Open Command Prompt
If you’re looking to use Command Prompt, the first step is to open it. You can do this by going to the Start Menu and typing “CMD” into the search bar. Once you see “Command Prompt” appear, click on it to open a new window.
Command Prompt is a powerful tool that allows you to execute various commands on your computer. It’s a favorite among power users and IT professionals because of its versatility and flexibility. The interface may seem intimidating at first, but don’t worry, you don’t need to be a computer whiz to make use of it.
There are plenty of online resources available to help you learn how to use it. So if you want to take your computing skills to the next level, why not give the Command Prompt a try?
Type diskpart > list disk > Check for Crucial SSD
If you’re having trouble locating your Crucial SSD on your computer, using the Command Prompt can help. First, open the Command Prompt by searching for it in the Start menu. Once open, type in “diskpart” and hit enter.
This will take you to Diskpart, where you can type “list disk” to see all the disks connected to your computer. Look for your Crucial SSD on the list, which should be labeled with its size. If you see it, congratulations! Now you know that your Crucial SSD is recognized by your computer.
However, if you don’t see it, try checking the connections on your computer or contacting Crucial support for further assistance. By using the Command Prompt and Diskpart, you can easily check for your Crucial SSD and ensure that it’s properly connected to your computer.
Type exit to close Command Prompt
Command Prompt If you’re familiar with Windows, you’ve likely seen or heard about Command Prompt. This nifty little tool is a hub for executing commands that can help you manage your computer more efficiently. Command Prompt uses text-based commands, which means you’ll be typing in simple phrases or strings of code to make things happen.
But don’t worry, it’s not as intimidating as it might sound! One tip to keep in mind is to always type “exit” when you’re finished using Command Prompt. This will close the program and ensure that any changes or commands you’ve executed are properly saved. Whether you’re looking to troubleshoot issues, navigate directories, or perform a variety of tasks, Command Prompt is a powerful tool that can help you get there.
So, go ahead—give it a try!
Conclusion
In conclusion, recognizing a crucial SSD in Windows 10 is crucial to ensuring optimal performance and preventing potential headaches. With a little bit of know-how and some simple steps, you can easily identify and harness the power of your SSD. So why settle for less when you can unlock your device’s full potential? Don’t be left in the dust – take the time to recognize the importance of recognizing your crucial SSD today!”
FAQs
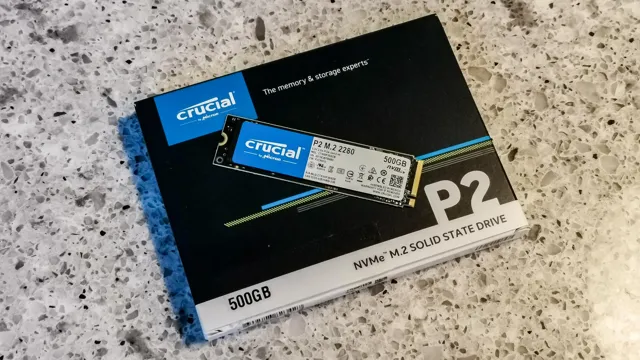
What is a crucial SSD?
A crucial SSD is a type of solid-state drive manufactured by Crucial, a division of Micron Technology.
How do I install a Crucial SSD on Windows 10?
To install a Crucial SSD on Windows 10, you can clone your existing hard drive to the new SSD using software such as Acronis True Image or Samsung Data Migration. Alternatively, you can do a fresh install of Windows 10 on the SSD by creating a bootable USB drive with the Windows 10 media creation tool.
How do I recognize my Crucial SSD in Windows 10?
To recognize your Crucial SSD in Windows 10, go to “Device Manager” and look for the SSD under the “Disk Drives” section. Alternatively, you can use third-party software such as CrystalDiskInfo or HWiNFO to view information about your SSD.
Can I use a Crucial SSD for gaming on Windows 10?
Yes, a Crucial SSD can significantly improve load times and overall performance for gaming on Windows 10. However, consider getting a larger capacity SSD to accommodate large game files and updates.