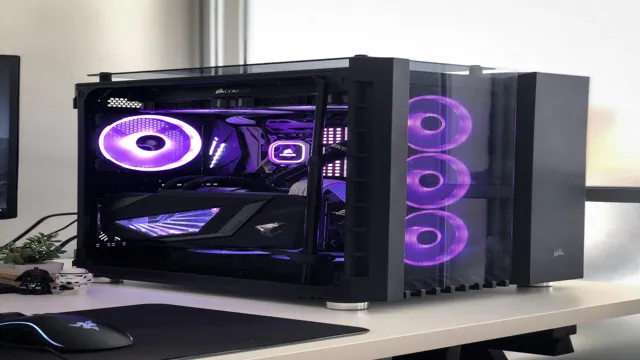
Are you looking to upgrade your SSD on your Corsair 680x case? Do you find yourself struggling to remove the SSD cage? Fear not, because we’ve got you covered! In this blog, we will guide you through the process of removing the SSD cage on your Corsair 680x case. With our step-by-step instructions, you’ll be able to remove the SSD cage with ease, allowing you to upgrade your storage and improve your PC’s performance. So let’s dive in and get started on this simple yet crucial process!
Tools Required
Are you looking to remove the SSD cage in your Corsair 680x case? There are a few tools you’ll need before jumping into it. First, you’ll need a Phillips head screwdriver to remove the screws holding the SSD cage in place. Additionally, you may need a pair of pliers to help grip and twist any stubborn screws.
It’s also a good idea to have a clean and dry workspace to work in, as well as a soft cloth to prevent any scratches or damage to the case. Once you’ve gathered all the necessary tools, you’re ready to begin the process of removing the SSD cage. By taking the proper precautions and having the right tools, removing the SSD cage in your Corsair 680x case is a doable task.
– Phillips Head Screwdriver
If you want to complete any DIY project that involves screws, you’re going to need a reliable Phillips head screwdriver. This type of screwdriver features a pointed tip with an X-shaped groove that fits perfectly in Phillips head screws. The main advantage of using this type of screwdriver is that it allows you to apply more torque with less slippage, making it easier to drive the screw without damaging the head.
But not all Phillips head screwdrivers are created equal! You want to make sure you choose one that fits comfortably in your hand and has a sturdy handle for maximum grip. A high-quality Phillips head screwdriver will be durable and long-lasting, allowing you to use it on multiple projects. So, whether you’re putting together furniture, fixing a leaky faucet, or working on any other type of DIY project, a reliable Phillips head screwdriver is a must-have tool that should be in every homeowner’s toolbox.
So, go ahead and add one to your collection and enjoy smooth and effortless screw driving.
– Pliers or Allen wrench
When it comes to home repairs or DIY projects, having the right tools is essential. Pliers and Allen wrenches are two tools that you should have in your toolbox. Pliers are versatile tools that can be used for gripping, twisting, and cutting materials like wires or cables.
They come in different types, including slip joint pliers, needle nose pliers, and locking pliers. On the other hand, Allen wrenches, also known as hex keys, are commonly used for tightening and loosening bolts or screws with hexagonal sockets. They come in handy when working on bicycles, furniture, or even on electronic devices.
It is always good practice to have a set of both pliers and Allen wrenches readily available for any job that may come your way. By having these tools, you can easily handle any task with ease, and you can avoid making trips to the hardware store unnecessarily.
Step-by-Step Guide
Got a Corsair 680x case and looking to remove the SSD cage? No need to panic as we’ve got a step-by-step guide that’ll make the process a breeze. The first thing to do is remove the tempered glass panel from the side of your case. Once you’ve done that, you’ll need to unscrew the 2 screws that are holding the SSD cage in place.
These screws will be located on the top panel of your case, towards the rear. After you’ve removed the screws, gently lift the SSD cage upwards until it dislodges. Be careful not to damage or tug on any of the cables that may be attached to your SSD, especially if you haven’t disconnected them prior to removing the cage.
Once you’ve removed the cage, you’ll be able to reposition or remove your SSD(s) as needed. That’s it, you’ve successfully removed the SSD cage on your Corsair case!
– Power down and unplug your computer
If you are experiencing issues with your computer or need to perform maintenance tasks, one of the most important steps is to power down and unplug your device. This action not only ensures your safety when working with the internal parts of your computer, but it also helps prevent any electrical problems or potential damage to your device. To do this, simply shut down your computer through the operating system as you typically would, but make sure to completely power it off by holding the power button down until it shuts off.
Once your computer is powered down, unplug it from the wall or any other power source. This step should never be skipped or taken lightly, as it can greatly impact the longevity and functionality of your computer. So, next time you need to work on your computer, remember to power down and unplug it first for your safety and the safety of your device.
– Remove the tempered glass panel and other components
Removing the tempered glass panel and other components from your PC is an essential step when upgrading or cleaning your computer. First, unplug the power cable and any other cables connected to your PC. Then, remove the side panel of your computer case to reveal the internal components.
The tempered glass panel is usually attached to the case using screws, so you need to unscrew them to remove the panel safely. Be careful not to damage the panel while removing it. Once the panel is off, you can access other components like the graphics card, power supply, RAM, and cooling system.
Before handling any internal components, make sure to discharge any static electricity from your body by touching a metal object. You can then remove the components by unscrewing them or disconnecting them from their sockets. Remember to keep track of which screws go where to avoid confusion when reassembling your PC.
With these steps, you can easily remove the tempered glass panel and other components from your computer case.
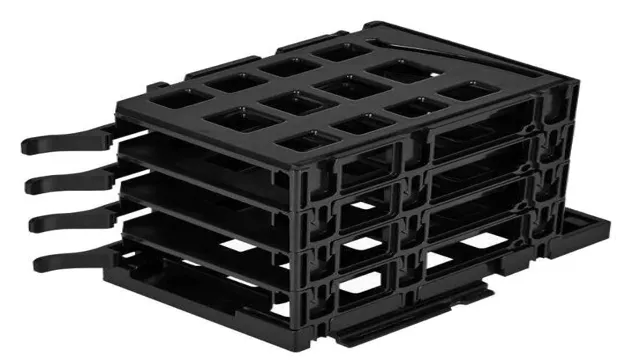
– Locate the SSD cage and unscrew it
If you want to upgrade your computer’s storage, adding an SSD is an excellent option. However, you will need to know how to install it correctly. One critical step is locating the SSD cage and unscrewing it.
The SSD cage is where you will mount your new drive. First, you need to identify where it is located in your computer. It’s typically positioned in the hard drive bay, but the location may vary depending on your computer model.
Once you’ve found it, carefully unscrew it, taking care not to damage any cables or components inside your computer. You can then go ahead and install your SSD and screw the cage back into place to secure it. By following these steps, you can easily install your SSD and enjoy faster speeds and more storage capacity.
– Use pliers or Allen wrench to remove the cage
When it comes to removing the cage from your device, using the right tools is crucial. You can either use pliers or an Allen wrench to get the job done. Pliers are widely used because of their simplicity and convenience, and they come in various sizes to accommodate different types of cages.
On the other hand, Allen wrenches are perfect for removing screws that hold the cage in place, making them a popular choice among DIY enthusiasts. To remove the cage, you need to grip it firmly using the pliers or secure the Allen wrench at the base of the screw. With a gentle twist, the cage should come off easily.
Be sure to use caution when handling the device, especially when removing the cage, to avoid any damage to the device or injury to yourself. Using the right tools and techniques is critical in ensuring the successful removal of the cage from your device.
Alternative Methods
Removing the SSD cage in the Corsair 680x case might seem like a daunting task, but there are a few alternative methods to make it easier. One option is to use a long screwdriver to unscrew the cage from the inside of the case. Alternatively, you could remove the side panels of the case, which would give you better access to the cage and make it easier to remove.
Another option is to detach any cables or components that might be in the way of the cage before attempting to remove it. Whichever method you choose, always make sure to take precautions such as wearing an anti-static wrist strap to avoid damaging any electronic components. With these alternative methods, removing the SSD cage in the Corsair 680x case should be a breeze!
– Removing the top panel to access the cage
If you’re not comfortable removing the top panel of your computer to access the cage, don’t worry. There are alternative methods you can try to access it without risking damage to your hardware. One option is to check for any removable side panels that may provide direct access to the cage.
If that’s not possible, you can also try removing the back panel or even the front panel, depending on your computer’s design. However, it’s important to remember that not all computer cases are created equal, and you may need to consult your user manual or seek the advice of a professional if you’re unsure. By taking the time to explore your options and do some research, you can safely and effectively access your computer’s cage without causing any unnecessary damage or putting yourself at risk.
– Modifying the SSD mounting brackets
If you’re looking for an alternative way to mount your SSD in your computer case, modifying the SSD mounting brackets might be the answer. This method involves adjusting the metal brackets that come with your case so that they can hold the SSD securely in place. To do this, you will need to remove the existing screws that hold the brackets in place, reposition them, and drill new holes to secure them.
This method may seem daunting, but it can be a cost-effective way to mount your SSD while also ensuring that it is secure and protected. Just be sure to take your time and measure carefully to avoid damaging your SSD or your case.
Final Thoughts
In conclusion, removing the SSD cage from a Corsair 680X case is a fairly simple process that can greatly increase the potential storage capacity of your rig. By carefully following the steps outlined in the user manual or by consulting with a professional, you can avoid damaging your hardware and ensure a seamless installation of additional drives. Additionally, it’s important to consider the specific needs of your system when deciding whether or not to remove the cage, as it can impact airflow and overall performance.
With the right tools and guidance, however, the benefits of removing the SSD cage can far outweigh any potential drawbacks. So, if you’re looking to expand your storage options and optimize your build, consider removing the SSD cage from your Corsair 680X case and explore the limitless possibilities of your gaming or productivity set-up!
Conclusion
In essence, removing the SSD cage from the Corsair 680X case is like performing delicate surgery on a patient – one wrong move and disaster can strike. But fear not, with a little bit of patience, precision, and perhaps a touch of Jedi-like finesse, you too can become a master of this task. So go forth, my young padawan, and remove that pesky SSD cage like the seasoned PC builder you were destined to be.
May the force be with you!”
FAQs
How do I remove the SSD cage in the Corsair 680X case?
To remove the SSD cage in the Corsair 680X case, first, remove the tempered glass panel on the side where the SSD cage is located. Then, locate the screws that hold the SSD cage and use a screwdriver to remove them. Once the screws are removed, carefully slide out the SSD cage, making sure to disconnect any cables connected to it.
Can I install additional SSDs in the Corsair 680X case?
Yes, the Corsair 680X case supports the installation of additional SSDs. You can install them in the dedicated SSD cages or in the modular drive trays with the use of additional brackets.
How many SSDs can I install in the Corsair 680X case?
The Corsair 680X case comes with two dedicated SSD cages that can each hold two SSDs. In addition, the modular drive trays can also hold two SSDs with the use of additional brackets. So, in total, you can install up to six SSDs in the 680X case.
Does the Corsair 680X case have any dust filters for the SSD cages?
Yes, the Corsair 680X case comes with dust filters for all intake fans, including the ones located in the SSD cages. These filters are removable and washable, making maintenance easy and hassle-free.