
Are you tired of your MacBook Pro’s slow performance? Upgrading your SSD might just be the solution to your problem. Not only does it improve your computer’s speed, but it also provides more storage space for all your files and applications. In this step-by-step guide, we’ll walk you through the process of upgrading your MacBook Pro SSD.
From checking compatibility to backing up your data, we’ll cover everything you need to know to ensure a smooth and successful upgrade. Think of it like a car tune-up. Just as changing the oil and replacing worn-out parts enhances performance, upgrading your MacBook Pro’s SSD can significantly improve its functionality.
And the best part? You don’t need to be tech-savvy to do it yourself. Get ready to boost your MacBook Pro’s speed and storage with this simple and easy-to-follow guide. Let’s get started!
Check Compatibility
Looking to upgrade your MacBook Pro’s SSD? CNET has you covered with a step-by-step guide on how to do just that. However, before you go out and purchase a new SSD, it’s important to check compatibility with your specific MacBook Pro model. Apple uses a proprietary connector for its SSDs, so it’s crucial to ensure that the replacement SSD you choose is compatible with your MacBook Pro.
CNET recommends checking your MacBook Pro’s model number and verifying the specific type of SSD that is compatible before making any purchases. It’s always better to be safe than sorry when it comes to hardware upgrades, so take the time to do some research and ensure that your new SSD will work with your MacBook Pro before you begin the installation process.
Find MacBook Pro Model
If you’re a MacBook Pro user, you may have encountered compatibility issues when trying to install certain software or hardware on your device. The first step in solving this problem is to identify your MacBook Pro model. This can be done by going to the Apple menu, selecting “About this Mac,” and checking the model name and year.
Once you know your MacBook Pro model, you can check its compatibility with the software or hardware you want to use. This can save you a lot of frustration and time in the long run. Don’t forget to also check for any updates or patches that may be available to ensure optimal performance and compatibility.
Remember, different MacBook Pro models have different capabilities, so it’s important to check before making any purchases or installations.
Choose Compatible SSD
When choosing an SSD, it’s important to check compatibility with your system to ensure optimal performance. Not all SSDs are created equal and not all are compatible with all systems, so it’s important to do your research before making a purchase. Compatibility issues can cause slow performance or even damage to your system, so it’s best to err on the side of caution and check the manufacturer’s website for compatibility information.
Look for SSDs with specifications that match your system’s requirements, such as the interface, form factor, and storage capacity. Doing so will ensure that your SSD will work seamlessly with your system and provide you with the performance boost you’re looking for. Remember, compatibility is key when choosing an SSD!
Create a Backup of Your Mac
Upgrading the SSD on your MacBook Pro can be a game-changer, but before you start the process, it’s important to create a backup of your Mac. This ensures that you don’t lose any important files or data during the upgrade. There are several ways to back up your Mac, including using Time Machine, iCloud, or external hard drives.
Time Machine is a built-in backup feature that takes automatic backups of your Mac at planned intervals, and iCloud allows you to store your data in the cloud for easy access from any device. External hard drives, on the other hand, provide a physical backup option that allows you to transfer files manually. Whichever method you choose, make sure to create a full backup of your Mac and verify that everything is backed up correctly before proceeding with the upgrade.
Taking the time to create a backup may seem tedious, but it’s an essential step to ensure that your data is safe and secure during the upgrade process.
Use Time Machine or External Drive
If you’re a Mac user, creating a backup of your system is essential to ensure you don’t lose your valuable files and data. One of the easiest and most effective ways to create a backup is by using Time Machine or an external drive. Time Machine is a built-in backup system that comes with every Mac, and it allows you to back up all of your files automatically.
To use Time Machine, all you need is an external hard drive that is compatible with your Mac. Once you have your external drive connected, Time Machine will begin backing up your files automatically. Alternatively, you can use an external drive to manually copy your files from your Mac, creating a separate backup that you can keep at a different location.
By using Time Machine or an external drive, you can ensure that your valuable data is protected and recoverable in case of a system failure or other issue.
Transfer Backup to New SSD
Creating a backup of your Mac is an essential step before transferring your data to a new SSD. A backup ensures that all your files, applications, and preferences are saved adequately. You can create a backup using the Time Machine feature in macOS.
Time Machine creates a copy of your Mac’s entire storage system. To start, plug in an external hard drive, and follow the instructions to set up Time Machine. Once set up, Time Machine will automatically backup your Mac every hour.
You can also back up manually by clicking the Time Machine icon in the menu bar. It’s crucial to keep the external hard drive in a safe place after creating the backup. In case anything goes wrong during the transfer process, you’ll have a copy of all your important data.
Remember to update your backup regularly to ensure the protection of your data. By creating a backup of your Mac, you’ll be able to transfer your data to a new SSD without worrying about losing any important files.
Open Up Your MacBook Pro
If you’re looking to upgrade your MacBook Pro’s SSD, don’t be intimidated! It may seem daunting to crack open your laptop, but with a bit of patience and the right tools, it’s a straightforward process. First, make sure you have the correct replacement SSD. CNET recommends getting a drive specifically designed for your MacBook Pro model, as it’ll be easier to install and provide the best performance.
Next, power off your laptop and disconnect any cables or accessories. Then, you’ll need to carefully remove the MacBook Pro’s bottom case using a Phillips #00 screwdriver. Once the case is off, locate the SSD and use a Torx T5 screwdriver to unscrew it from the bracket.
Gently pull the SSD out of the slot and replace it with the new one. Finally, reattach the bracket and bottom case, power on your laptop, and enjoy the benefits of your upgraded SSD, such as faster bootup and app loading times. With a little care and attention, you can easily upgrade your MacBook Pro’s SSD and give your device a new lease on life.
Prepare the Workspace
As you prepare to dive into your work, the first step is to open up your MacBook Pro. It may seem like a simple task, but taking the time to properly set up your workspace can help clear your mind and increase productivity. Before opening your MacBook Pro, make sure your desk is clean and free of distractions.
Remove any unnecessary clutter or items that may cause you to lose focus. Once your workspace is cleared, take a deep breath and open up your laptop. As you do, think about the opportunities that await you and the work you will accomplish.
By taking the time to prepare your workspace, you set yourself up for success and create an environment that promotes focus and creativity. Let’s get started!
Remove the Bottom Case
If you’re looking to upgrade or repair your MacBook Pro, the first step is to remove the bottom case. To do this, make sure your computer is shut down and disconnected from any power source. Next, use a screwdriver to remove the ten screws that hold the case in place, being careful to keep track of where each one goes.
Once the screws are removed, gently lift up on the case and slide it off the computer. It may take some wiggling and gentle prying to get it off, but be patient and don’t force it. With the bottom case removed, you’ll have access to the internal components of your MacBook Pro and can begin your repairs or upgrades.
Remember to take your time and be careful when working on your computer. With a little patience and attention to detail, you’ll be able to successfully open up your MacBook Pro and get started on your project.
Disconnect the Battery
Disconnecting the battery is an essential step when opening up your MacBook Pro. First, locate the screws that hold the bottom plate in place and unscrew them using a screwdriver. Once you remove the plate, you’ll see the battery’s location.
It’s crucial to disconnect the battery before proceeding with any repairs or upgrades to prevent any electrical damage or shock. To do this, gently and carefully unplug the battery connector from the logic board. It’s best to use an anti-static wrist strap to ensure your safety.
This may seem like a small task, but it’s essential to take this step seriously for your MacBook Pro’s safety and longevity. Remember to handle all components with care and ensure everything is reassembled correctly to avoid any issues.
Install the New SSD
Upgrading the SSD on your MacBook Pro is a smart move that can give your device a new lease on life. If you want to enjoy faster boot-up times, quicker application launches, and smoother overall performance, then you definitely need to upgrade your SSD. Luckily, the process of installing a new SSD in your MacBook Pro is not as complicated as it might seem.
As outlined in the helpful CNET how-to guide on upgrading MacBook Pro SSDs, all you need is a Phillips screwdriver, a Torx screwdriver, and of course, a new SSD. Once you have these tools and supplies, it’s simply a matter of following the steps outlined in the guide to remove your old SSD and install the new one. Whether you’re a seasoned tech pro or just a curious DIY enthusiast, upgrading your MacBook Pro’s SSD is a project that’s definitely worth taking on.
So go ahead and give it a try – you might just be surprised at how much of a difference it can make!
Remove the Old SSD
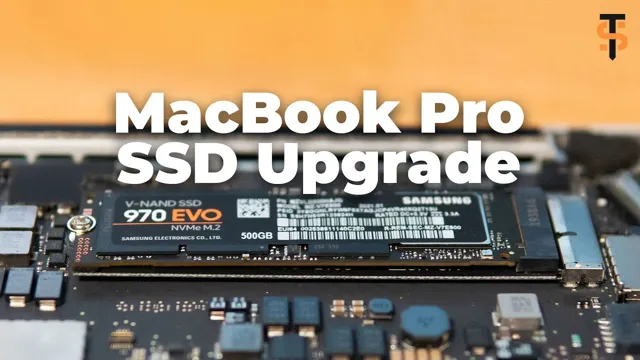
Now that we have removed the old SSD, it’s time to install the new one. Before we get started, make sure that the new SSD is the proper size and type for your computer. Most SSDs come with screws and mounting brackets, but if yours did not, you may need to purchase them separately.
First, slide the new SSD into the slot where the old one was located. Next, secure it in place using the screws or mounting brackets provided. Make sure that the SSD is firmly seated and properly aligned.
Once it’s secure, it’s time to connect the power and data cables. Refer to the manufacturer’s instructions to ensure that you connect them correctly. Finally, close the case and power up your computer.
That’s it! You have successfully installed a new SSD. Enjoy faster boot-up times and improved performance!
Insert the New SSD
The process of installing a new SSD can be daunting, but it doesn’t have to be. With a few simple steps, you can have your new SSD up and running in no time. The first step is to physically install the SSD into your computer.
Begin by turning off your computer and unplugging it from any power sources. Next, locate your computer’s hard drive bay and remove any existing hard drives. Gently insert your new SSD into the bay, making sure that it is securely in place.
Once the SSD is installed, you can then reconnect any cables and power sources. It’s important to note that the exact installation process may vary depending on your computer model, so be sure to consult your computer’s documentation for any specific instructions. With your new SSD installed, you can enjoy faster boot times, improved performance, and increased storage capacity.
Reconnect the Battery
When installing a new solid-state drive (SSD) in your computer, it’s important to properly reconnect the battery before moving on to the next step of installing the new SSD. This is especially important if you’re working with a laptop, as disconnecting the battery will prevent any electrical surges from damaging your computer. To reconnect the battery, start by locating the battery connector and carefully plugging it back into place.
Make sure the connector is firmly in place and then use a screwdriver to replace any screws or clips that hold the connector in place. Once the battery is reconnected, you can move on to installing your new SSD. Remember to take your time and be gentle when working with your computer’s internal components to avoid any damage or errors.
By taking these crucial precautions, you can ensure a successful SSD installation and a smoothly functioning computer for years to come.
Reassemble Your MacBook Pro
Now that you’ve installed a new SSD into your MacBook Pro, it’s time to reassemble everything. Make sure all the cables and screws are properly secured before putting the bottom cover back on. Double-check your work to ensure you didn’t miss anything before powering on your MacBook Pro.
It might be a good idea to take some time to test out all the features and make sure they’re working correctly. Your new SSD should give your MacBook Pro a significant boost in performance, so enjoy the faster speeds and increased storage capacity. Remember, it’s crucial to take your time during the reassembly process to avoid damaging any components or causing any issues down the line.
With this upgrade, you’ll have a MacBook Pro that is ready to handle even the most demanding tasks with ease.
Replace the Bottom Case
Now that you’ve successfully replaced the bottom case of your MacBook Pro, it’s time to reassemble your device. Start by carefully aligning the bottom case with the rest of the device and snapping it into place. Once the case is secure, it’s time to reattach all the screws that you removed earlier.
Be sure to tighten each screw just enough to make sure it’s secure, but not too tight that you risk damaging your device. Next, you’ll need to reconnect any cables or wires that you disconnected earlier, including the keyboard and trackpad cables. These cables can be quite delicate, so take your time and handle them with care to avoid damaging them.
Once all the cables are connected, snap the battery back into place. Finally, flip your MacBook Pro over and make sure everything is working correctly before putting it back into service. Your device should now be fully functional and ready to handle all your computing needs.
Turn on Your MacBook Pro and Test SSD
Once you’ve completed installing the new SSD into your MacBook Pro, it’s time to reassemble the device. Start by reattaching the bottom case. Make sure it clicks into place and all the screws are tightened snugly.
Then, reattach your MacBook Pro’s display assembly. Carefully align the cables and make sure they’re securely connected. Double-check that the hinge screws are tightened and your MacBook Pro’s display opens and closes smoothly.
Once everything is in place, it’s time to turn on your MacBook Pro and test out the new SSD. You should notice a significant improvement in performance and speed. Your MacBook Pro should boot up faster and run applications and tasks more efficiently.
Congratulations, you’ve successfully upgraded your MacBook Pro’s storage and brought new life to your beloved device!
Conclusion
In conclusion, upgrading your Macbook Pro SSD is like giving your trusty steed a turbo boost. It’s a relatively easy process that can result in lightning-fast boot times, smoother multitasking, and increased storage space. Plus, with the right tools and guidance, anyone can do it.
So why settle for sluggish performance when you can unleash the full potential of your Macbook Pro? Upgrade that SSD and ride off into the sunset with blazing speed and confidence.”
FAQs
What are the benefits of upgrading the SSD on a MacBook Pro?
Upgrading the SSD can improve your MacBook Pro’s speed and performance, as well as increase storage capacity.
Can I upgrade the SSD on my MacBook Pro myself?
Yes, you can replace your MacBook Pro’s SSD with a new one yourself, but it requires some technical skill and knowledge.
What size SSD should I get for my MacBook Pro?
The size of your SSD depends on your storage needs. However, it is recommended to get at least 256GB of storage.
Will upgrading the SSD on my MacBook Pro void my warranty?
If you perform the upgrade yourself, it may void your warranty. It’s recommended to have the upgrade done by an authorized Apple technician to avoid any potential issues.