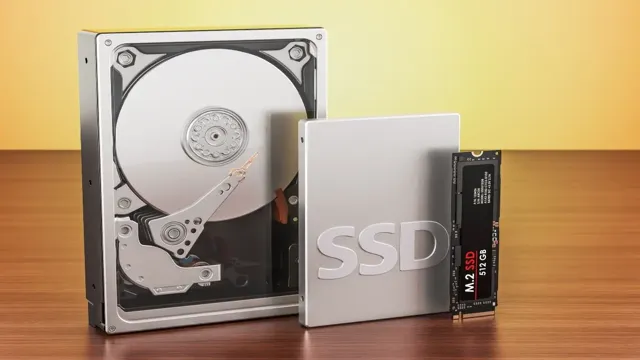
Upgrading to a new SSD is exciting, it’s like getting a brand new engine for your computer. However, shifting your precious data from the old hard disk drive (HDD) can be daunting. Nevertheless, the process is simpler than you might think.
In the following article, we’ll discuss the easiest and most effective ways to transfer your data from the old HDD to the new SSD. We’ll make sure you know all of your options before you get started so that you can choose the best one for you.
Backup your HDD Data
Congratulations on purchasing a new SSD! Now the question is: how do you transfer your data from your old HDD to your new SSD? The most efficient way to do this is by backing up your HDD data onto an external hard drive. You can do this by either using a backup software or manually copying and pasting your files onto the external hard drive. Once you have your backup completed, you can then install your new SSD and transfer your files over from the external hard drive.
It’s important to note that you should also create a backup of your new SSD data in case of any future mishaps. By backing up your data, you can ensure a smooth transfer process and protect your important files.
Use Windows Backup and Restore
If you’re looking for a simple and efficient way of safeguarding your data, Windows Backup and Restore is a great option. It’s a feature built into Windows that automatically creates a backup of all your important files and settings, allowing you to easily recover in case of an unforeseen issue. All you have to do is set up the backup process and let the system do its job.
Windows Backup and Restore is especially convenient if you want to move your data to a new hard drive or computer, or if you simply want to keep a copy of your files in case your hard drive fails. Plus, it’s free and easy to use, making it accessible to all kinds of users. By backing up your HDD data regularly, you can rest assured that your important files are protected no matter what.
Copy selected files to External Hard Drive
Backing up your data is crucial these days, and copying selected files to an external hard drive is one of the most effective ways to secure your data. With an external hard drive, you can make a full backup or back up only the files and folders you need, keeping your data safe and accessible. The process is simple and involves connecting the external hard drive to your computer and selecting the files to copy.
Once you have chosen the files, simply drag and drop them onto the external hard drive. The most important thing to remember is to keep your external hard drive in a safe place, preferably away from your computer, to avoid any possible data loss due to unforeseen events like theft, fire, or water damage. Taking this simple step can save you from headaches and loss of valuable memories or important data.
So, be sure to make a backup of your data regularly and remember that taking care of your data is the first step in taking care of yourself.
Install and Connect new SSD
Congratulations on your new SSD purchase! Transferring files from your old HDD shouldn’t be a complicated process. To start, you should physically install the SSD in the appropriate drive bay in your computer. Once installed, you can use cloning software to transfer all the files, operating system, and applications from your old HDD to the new SSD.
Some SSDs may even come with their own cloning software, making the transfer process much easier. Before you start the cloning process, make sure you have a backup of your current files, just in case anything goes wrong. You don’t want to lose any important data during the transfer.
Once the backup is complete, use the cloning software to copy the contents of the old HDD onto the new SSD. This process may take some time, depending on how much data you have on your old HDD. Once the clone is complete, you will need to set your computer to boot from the new SSD.
This can be done in the BIOS settings, which you can access by pressing a specific key during startup (usually F2 or Del). Once you’re in the BIOS settings, look for the boot order and set the new SSD as the primary boot disk. When you’re done, restart your computer and make sure everything is working properly.
You should notice a significant improvement in speed and performance with the new SSD. Don’t forget to wipe your old HDD clean and repurpose it for backup or storage purposes. Congratulations on your successful transfer to the new SSD!
Open PC Case and Install new SSD
Installing a new SSD is a great way to improve the performance and speed of your computer system. First, you need to open up your PC case and locate an available drive slot for the SSD. Once you have found an appropriate location, carefully insert the SSD into the slot and secure it with screws.
Make sure to connect the necessary cables to the SSD, such as the SATA power and data cables. Once everything is securely in place, you can power on your computer and initialize the drive. With your new SSD installed and connected, you can enjoy a faster and more responsive computing experience.
Don’t forget to transfer your important files and programs to the new drive for optimal performance.
Connect SATA Cable / Power Cable
Once you have your new SSD in hand and ready to install, the next step is to connect it to your computer. First things first: you’ll need to connect the SATA cable. This is the data transfer cable that allows your computer to communicate with the SSD.
You’ll want to locate the SATA port on your computer’s motherboard, which is usually located near the hard drive bays. Once you’ve found it, simply plug one end of the SATA cable into the port and the other end into the SSD. Now that the data cable is connected, it’s time to connect the power cable.
This is what provides electricity to your SSD, allowing it to function properly. Locate an available SATA power cable from your power supply unit (PSU) and plug it into the SSD. Be sure to use the correct cable, as using the wrong one can cause damage to your SSD.
With both the SATA and power cables connected, your SSD is now ready to go! Simply close up your computer, power it on, and enjoy the improved performance of your new SSD. Remember to always handle your SSD carefully and properly ground yourself before handling any computer components to avoid static electricity damage.
Clone your old HDD to new SSD
So, you’ve made the big decision to upgrade to a new SSD and leave your old HDD behind. Congratulations! Now comes the task of transferring all of your data from the old drive to the new one. This process is called cloning and it’s actually quite easy.
You can use a number of cloning software options available online, some of which are free. Once you have your software, plug in your new SSD and follow the program’s instructions. The software will create an exact copy of your old HDD and transfer it to the new SSD.
This includes your operating system, files, and programs. It’s important to note that if your old HDD is larger than your new SSD, you will need to delete some files or resize partitions to ensure everything will fit. Once the process is complete, you’ll be ready to boot up your new SSD just like you did with your old HDD.
It’s as simple as that!
Download and Install Cloning Software
To upgrade your computer’s speed and performance, one of the essential steps is to clone your old HDD to a new SSD. But how do you clone your HDD? The answer is to download and install cloning software, which can help you transfer all data from your old drive to the new one with ease. There are many cloning software available on the market, but you need to choose the one that is compatible with your computer’s hardware and operating system.
Some of the most popular cloning software include Clonezilla, EaseUS Todo Backup, Acronis True Image, and Macrium Reflect. Once you have selected the software, download and install it on your computer following the instructions provided by the supplier. After successful installation, connect your new SSD via USB and launch the software.
Finally, select the option to clone your old HDD to the new SSD, and the software will do the rest for you. With the right cloning software, upgrading to a new SSD has never been easier and more efficient!
Select your HDD as Source and SSD as Destination
Cloning your old HDD to a new SSD is a great way to upgrade your computer’s performance without losing any of your important files or programs. One of the first steps in this process is selecting your HDD as the source and your SSD as the destination. This will ensure that all of your data gets transferred over to the new drive.
It’s important to make sure that your SSD has enough space to hold all of the data on your old HDD. Once you’ve selected your drives, the next step is to start the cloning process. This can be done using a variety of software tools that are available online.
Some popular options include EaseUS Todo Backup, Macrium Reflect, and Clonezilla. These tools are designed to make the cloning process as easy as possible, even for those who have never done it before. When using a cloning tool, it’s important to follow the instructions carefully and make sure that you are selecting the correct drives.
You don’t want to accidentally overwrite any important files or programs on your old HDD. You should also make sure that you have a backup of all your important data, just in case something goes wrong during the cloning process. Overall, cloning your old HDD to a new SSD can be a great way to upgrade your computer’s performance without losing any of your data.
By selecting your drives carefully and using a cloning tool, you can make the process as easy and stress-free as possible. So if you’re looking to give your computer a boost, consider cloning your old HDD to a new SSD today!
Start cloning Process and wait for completion
If you’re looking to upgrade your computer’s hard drive from an old HDD to a new SSD, cloning your old HDD to the new drive is a simple solution that allows you to transfer all of your files, programs, and settings without having to start from scratch. To begin the process, you’ll need cloning software, which will allow you to create a bootable USB drive and initiate the cloning process. Once you have your software, plug in both your old hard drive and your new SSD, and follow the steps provided by your software to begin the cloning process.
Depending on the size of your hard drive and the speed of your computer, the process could take anywhere from several hours to a full day or more to complete. Once the cloning process is finished, your new SSD should have an exact copy of your old hard drive, allowing you to continue using your computer without interruption. So, start cloning your old HDD to your new SSD and wait for completion with the satisfaction of knowing your files are safe and secure.
Test and Verify your new SSD
So you just bought a new SSD and want to transfer all your data from your old HDD? Well, the first thing you need to do is test and verify your new SSD to make sure it’s working properly. You can do this by installing the SSD into your computer, powering it on, and accessing the BIOS to ensure that your SSD is recognized. If it’s not, you might need to check your connections and ensure that your SSD is properly installed.
Once you’ve verified that your SSD is working correctly, it’s time to transfer your data. There are multiple ways to do this, but one of the easiest is by using a cloning software. This software will create a clone of your old HDD onto your new SSD, making the transfer process quick and painless.
Alternatively, you could also manually transfer your files by copying them onto an external drive and then transferring them onto your new SSD. Either method will work, but using a cloning software is generally faster and more efficient. So go ahead and transfer your data with confidence, knowing that your new SSD is ready to go!
Restart your PC and press F2 or F10 to enter BIOS
If you recently upgraded to an SSD, it’s essential to test and verify it to ensure it’s functioning correctly. One of the first steps is to restart your PC and enter the BIOS by pressing either F2 or F10, depending on your device. Once you’re in the BIOS, navigate to the storage settings and verify that the SSD is recognized and listed as the primary storage device.
If it’s not listed, you may need to check the connections or re-install the drive. Another way to check is by using a benchmarking software tool that tests the read and write speeds of your SSD. This test can determine whether your SSD is functioning at the expected speed and performance level.
Overall, verifying and testing your SSD ensures that your system is running smoothly and that you’re making the most out of your upgraded storage.
Check if your SSD is detected as primary boot device
SSD, primary boot device, verify, test One of the crucial steps after installing a new SSD is to ensure it is detected as the primary boot device. Otherwise, your system might still be using the old boot device, and you won’t notice any significant improvement in performance. To check this, restart your computer and access the BIOS settings.
Look for the Boot Order or Boot Priority settings, and verify that your SSD is listed first. If not, you may need to adjust the settings manually. It’s essential to verify this before installing any new software or applications, as those will only run faster if launched from the SSD.
By ensuring your SSD is detected as the primary boot device, you can enjoy the full benefits of faster and more responsive computing.
Perform basic tests like boot time and file loading speed
If you’ve just installed a new SSD, it’s important to test and verify it to make sure it’s running properly. One way to do this is by performing basic tests like boot time and file loading speed. To test the boot time, simply turn on your computer and time how long it takes for it to fully boot up.
If your computer boots up faster than it did before, then your new SSD is doing its job. To test file loading speed, you can try opening large files or running programs that require a lot of memory. If they load faster than they did before, then your new SSD is definitely improving your computer’s performance.
It’s important to note that other factors like your computer’s hardware and software can also affect performance, but a new SSD can definitely make a difference. So go ahead and run those tests – your new SSD may just surprise you with its speed and efficiency!
Conclusion
In conclusion, transferring your data from an old HDD to a new SSD is like moving into a new house. You want to bring all of your favorite things with you, but you also have an opportunity to declutter and organize your belongings. With the right tools and a little patience, transferring your data can be a seamless and satisfying experience.
So go ahead, upgrade to that shiny new SSD and enjoy the benefits of faster speeds and a cleaner digital space!”
FAQs
What is an SSD and how is it different from an HDD?
An SSD (Solid State Drive) is a type of data storage device that uses NAND-based flash memory to store data. It differs from an HDD (Hard Disk Drive) in that it has no moving parts and thus can read and write data much faster than an HDD.
Why should I transfer data from my old HDD to a new SSD?
Transferring data from your old HDD to a new SSD allows you to retain all your important files, programs, and system configurations, while taking advantage of the faster read and write speeds of an SSD. This results in improved overall system performance and faster boot times.
What are the steps involved in transferring data from an old HDD to a new SSD?
Firstly, make a backup of all your important files and data. Then, install the new SSD and clone your old HDD onto it using a cloning software. Finally, set the SSD as the primary boot device in your system’s BIOS and test that everything is working correctly.
Can I transfer data from a laptop’s HDD to a new SSD?
Yes, you can. The steps involved are similar to those for a desktop computer, except that you may need a SATA-to-USB adapter to connect the new SSD externally if your laptop has limited internal storage options. Additionally, you can also choose to reinstall the operating system on the new SSD instead of cloning the entire drive.