Ready to upgrade your computer’s storage for blazing fast speeds? Look no further than installing a 500GB PCIe SSD! This powerful tool can greatly enhance your overall computing experience, with lightning-fast boot times, near-instant application launches, and rapid data transfer speeds. And while installing a PCIe SSD may sound intimidating, fear not! With this step-by-step guide, you’ll be able to easily install your new drive and enjoy all the benefits it has to offer. So, grab your screwdriver and let’s get started!
Preparing Your PC and Tools
If you’re planning on upgrading your PC with a 500 gig SSD PCIe, here’s how you can install it. First, you need to ensure that your PC is fully compatible with the new SSD. Check your motherboard’s manual to see if it supports PCIe NVMe or M.
2 SSD drives. Once you’ve confirmed compatibility, you can shut down your PC and open the case. Locate an empty PCIe slot and remove the metal bracket from the rear of the slot.
Gently insert the SSD into the slot and screw it down to secure it in place. Once the SSD is installed, you’ll need to install your operating system on it. You can do this by booting up your PC from the installation media and selecting the SSD as your primary drive.
Follow the on-screen instructions to complete the installation process. To ensure that your new SSD is running at optimal performance, you can also download and install SSD management software. This software will allow you to monitor your SSD’s health and performance, as well as optimize its settings.
Overall, installing a 500 gig SSD PCIe is a great way to boost your PC’s speed and performance. Just make sure to follow these steps carefully and always handle your PC’s components with care.
Check Motherboard Compatibility
Before installing a new motherboard, it’s important to check compatibility with your PC. A good place to start is by checking your current motherboard’s specifications to ensure the new one is compatible with your processor and RAM. Once you’ve confirmed compatibility, it’s time to gather the necessary tools to prepare your PC for a new motherboard.
You’ll need a screwdriver (preferably magnetic), thermal paste, an anti-static wrist strap, and a clean work area. It’s important to ground yourself by wearing the anti-static wrist strap and working on a clean, non-conductive surface. This will prevent electrostatic discharge that can damage your PC components.
With the right tools and preparation, you can safely and successfully install a new motherboard in your PC.

Get Necessary Tools
When preparing to work on your PC, it’s important to have the necessary tools at hand. One of the most essential tools you’ll need is an anti-virus software to protect your computer from malware and other malicious threats. You can choose from a variety of free and paid options, such as Avast, Norton, or McAfee.
Additionally, you’ll need to ensure that your operating system and other software programs are updated to the latest version to ensure they function correctly and provide the best performance. Another essential tool for PC maintenance is a disk cleaning software, which will rid your system of unnecessary files and clear up disk space. You can opt for either free or paid options like CCleaner or Disk Defragmenter.
Having these necessary tools at the ready will make your PC experience smoother, safer, and more efficient, keeping your system running like a well-oiled machine.
Back Up Data
Backing up your data is essential to keep your files safe and easily accessible. Before starting the backup process, make sure that your computer is updated and ready for the task. Check that your PC has enough available storage to accommodate the files you want to back up, and check that your power source is reliable.
You might also want to have an external hard drive or a cloud-based storage service to help with your backup efforts. These tools will help ensure that your data is well protected and secure. Having a backup plan in place can save you a lot of stress and frustration in the event of a cyber attack, system failure, or other unexpected incidents.
By following these simple steps and utilizing the right tools, you can help keep your data safe and secure in the long run.
Installing the SSD
So, you’ve finally decided to upgrade your PC’s storage with a 500-gig PCIe SSD. Congratulations on making a wise choice! Now, the next question is, how do you install it? Well, the good news is that it’s relatively simple, even for novice users. Firstly, you need to locate your PCIe slot on your motherboard.
It’s usually a long and narrow slot found near your CPU and RAM slots. Once you’ve located it, remove the metal bracket adjacent to it, and gently insert the SSD into the slot. Ensure that it fits perfectly into the socket on both sides.
Finally, screw back the metal bracket, and that’s it! You’ve successfully installed your new SSD. The next step is to initialize it and format it in your PC’s BIOS. This process slightly varies depending on your motherboard and operating system, so make sure to refer to an online guide for detailed instructions.
Enjoy the increased storage speed and reliability with your new SSD!
Accessing Your PC’s Interior
Installing an SSD in your PC is a great way to upgrade your computer’s performance and speed. Before you start, make sure you have the necessary tools and equipment to open your computer’s case. Once you have everything you need, gently open your computer’s case and locate the hard drive bays.
The SSD will need to be installed in one of these bays. You’ll need to disconnect the cables from your current hard drive and unscrew it from its mount. Once you’ve done that, carefully insert the SSD into the empty bay and secure it with screws.
Reconnect the cables to your new SSD, close up the case, and turn on your computer to test it out. With your new SSD installed, your PC should be faster and more responsive, allowing you to get more done in less time.
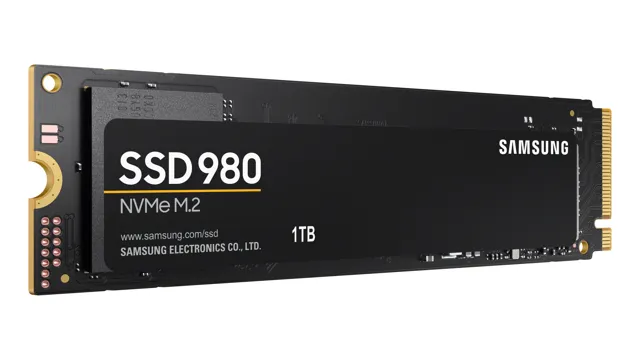
Inserting the SSD into the M.2 Slot
Installing the SSD into the M.2 slot is a simple process that can make a huge difference in your computer’s performance. First, make sure you have chosen the right type of SSD for your computer’s M.
2 slot. Once you have your SSD, turn off your computer and unplug it from the power source. Then, find the M.
2 slot on your motherboard – it should be labeled, and you can usually find it near the CPU. Carefully insert the SSD into the slot, making sure it is securely in place. If you encounter resistance, check to see if there is a screw or clip holding the SSD in place.
Once the SSD is in the slot, you can screw it in if necessary. Finally, close up your computer, plug it back in, and turn it on. You should notice a significant improvement in your computer’s speed and performance, thanks to your new SSD.
Screwing the SSD in Place
Now that you’ve connected the SATA and power cables to the SSD, it’s time to screw it into place. Locate the mounting bracket in your computer case and find the proper screw holes for your SSD. Then, grab the screws that came with your SSD or the mounting bracket and attach the SSD to the bracket.
Make sure the SSD is snugly secured in place, but don’t over-tighten the screws. Too much pressure could damage your SSD or the bracket. This step may sound simple, but it’s important to properly secure your SSD to ensure its longevity and prevent it from moving around while in use.
Once you’ve finished screwing in the SSD, you can begin setting it up and installing your operating system. With proper installation and maintenance, your SSD will provide fast and reliable storage for years to come.
Setting Up Your SSD
If you’re looking to upgrade your PC’s storage capacity, installing a 500 gig SSD PCIe can significantly boost your system’s speed and performance. The process of installing a PCIe SSD is relatively simple, but there are a few things you should keep in mind before diving into the task. Firstly, make sure your motherboard has an available PCIe slot designed for storage devices – check your documentation or manufacturer’s website for more information.
Once you’re sure you have the right slot, it’s time to install the SSD. Begin by shutting down your computer and unplugging it from the power source. Then, open your PC casing and locate the PCIe slot.
Gently insert the SSD into the slot, ensuring it’s properly aligned. Once the SSD is in place, use the screw provided to secure it to the motherboard. Finally, close up the casing, reconnect all cables, and power up the system.
Voila! Your SSD is successfully installed, and you can start reaping the benefits of faster boot times and improved application performance.
Accessing BIOS Settings
Accessing BIOS settings is an integral part of setting up your SSD. BIOS, or Basic Input/Output System, is a firmware interface that is responsible for initializing and testing hardware components of a computer when it is switched on. This also includes selecting which operating system to boot from and running a number of system checks.
To access BIOS settings, you’ll need to restart your computer and press the key that corresponds to your BIOS manufacturer’s key. Generally, this key is displayed on the screen during startup, but it can be different from one PC to the next. Once you’re in BIOS, navigate using your keyboard to find the settings that you need.
With the right settings selected, you can customize your computer’s hardware to your specific needs. By doing so, you can optimize the performance of your SSD while ensuring it is compatible with your system. With the right knowledge and skills, accessing BIOS settings is easy and can make a big difference in how your SSD works.
Detecting Your New SSD
Detecting a new SSD in your system can seem like a difficult task, but with a few simple steps, you can have it up and running in no time. The first thing you’ll want to do is physically install the SSD into your computer. Once installed, power on your system and enter your BIOS/UEFI settings.
From there, navigate to the Storage options and look for your new SSD. If it’s not immediately visible, try rebooting your system and entering the BIOS/UEFI settings again. Once you’ve located the SSD, you’ll want to format it and assign a drive letter, so it’s ready to use.
Overall, setting up your new SSD is a straightforward process that doesn’t require any special tools or skills. With a little patience and perseverance, you’ll have your new SSD integrated into your system in no time.
Formatting Your SSD
If you’re upgrading to a solid-state drive (SSD) or just need to format an existing one, it’s important to understand how to set it up properly. The first step is to ensure that your computer’s BIOS is set to recognize the SSD as the primary boot device. Once this is done, you can then proceed to format the SSD to prepare it for use.
Formatting your SSD is an essential step as it helps to remove any pre-existing data, freeing up space and ensuring optimal performance. To format your SSD, you can use the built-in disk management tool in Windows or a third-party tool such as MiniTool Partition Wizard. It’s important to note that formatting your SSD will erase all data on it, so be sure to back up any important files or data before proceeding.
By properly formatting your SSD, you’ll ensure that it’s optimized for performance and ready to use with your operating system and applications.
Conclusion
In conclusion, if you’re looking to boost the performance of your computer and unleash its full potential, upgrading to a 500 gig SSD PCIe drive is the way to go. Not only will you experience lightning-fast read and write speeds, but you’ll also enjoy increased reliability and durability. And the best part? Installing a PCIe drive is a breeze, even for those with minimal technical knowledge.
So go ahead and give your computer the gift of speed – your workload (and your sanity) will thank you!”
FAQs
1. Q: What is a PCIe SSD and why would I want one for my PC? A: A PCIe SSD is a type of solid state drive that connects directly to your computer’s PCIe interface for faster data transfer speeds than traditional SATA SSDs. It offers improved performance for tasks like booting up your computer and opening large files or applications. 2. Q: Can I install a 500GB PCIe SSD into my PC if it doesn’t already have one? A: Yes, you can install a PCIe SSD into your PC as long as your motherboard supports PCIe storage devices. You may need to check your motherboard specifications or consult with your manufacturer for compatibility before purchasing and installing the SSD. 3. Q: How do I physically install a PCIe SSD into my PC? A: First, make sure your PC is powered off and unplugged. Then, open up your computer case and locate an open PCIe slot on your motherboard. Remove the metal cover on the slot and insert the PCIe SSD into the slot. Secure the SSD with a screw and replace the cover if necessary. Finally, close up your computer case, plug it in, and power it on. 4. Q: Do I need to set up anything after installing a 500GB PCIe SSD into my PC? A: After physically installing the SSD, you may need to initialize and format the drive before you can start using it. You can do this through your computer’s disk management tool. You may also need to update your BIOS settings to ensure your PC can boot from the new SSD if you plan on using it as your primary storage device.