
Are you planning to upgrade your computer’s storage capacity by adding a 5 SSD? If you are, then you might want to know the necessary steps in connecting your 5 SSD SATA cable.
Connecting a SATA cable may sound simplistic, but some individuals might find it quite a task, especially if you’re doing it for the first time. In this blog post, we provide you with a comprehensive step-by-step guide on how to connect your 5 SSD SATA cable seamlessly.
SSD (Solid-State Drives) is an ideal component for your computer, providing you with faster boot times, improved application loading speeds, and faster data transfer. It is deemed the future of storage technology and supports SATA (Serial ATA) interface topology, which helps transfer data to and from the computer’s motherboard. Knowing how to connect a
5 SSD SATA cable is necessary when upgrading, assembling, or replacing a hard disk drive. This guide focuses on the crucial aspects of connecting the SSD SATA cable, taking you through the entire process in a step-by-step approach. We start with SSD installation, opening up your computer’s casing, identifying the correct SATA cable, connecting the drive, and finally, powering on your computer system.
This guide also provides you with helpful tips that will ensure your computer remains functional and keep the data transfer process seamless. Stay tuned for a detailed guide that guarantees you stress-free installation and connectivity of your 5 SSD SATA cable.
Read on, and let’s get started!
Gather Your Tools
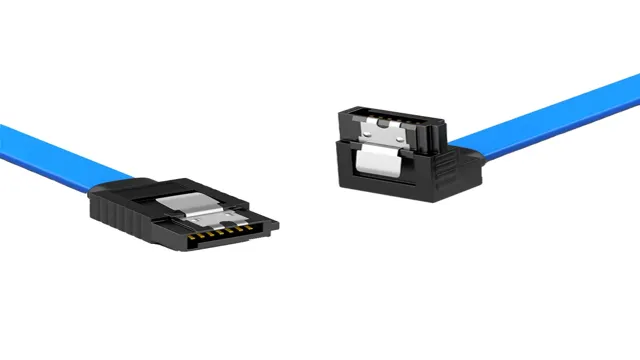
When it comes to connecting a 5 SSD via SATA cable, there are a few things you’ll need in order to get the job done right. First and foremost, you’ll need the SSD itself and a SATA cable.
Make sure the cable is rated for SATA III (6Gbps) for the fastest possible transfer speeds. You’ll also need a Phillips-head screwdriver to remove the cover from your desktop tower or the bottom of your laptop. Additionally, if you’re planning on cloning your existing drive to the new one, you’ll need cloning software such as Macrium Reflect or Acronis True Image.
Once you have all your tools at the ready, it’s time to get to work on getting your 5 SSD connected via SATA cable.
Identify Your SSD SATA Cable
When it comes to upgrading your computer’s storage capabilities, replacing your hard drive with a solid-state drive (SSD) can make a huge difference in terms of speed and overall performance. However, before you start the installation process, it’s important to first identify your SSD SATA cable. This is the cable that connects your SSD to your motherboard, and it’s essential for ensuring that your new drive is recognized by your computer.
To get started, you’ll need a few basic tools. These may include a screwdriver, a pair of pliers, and an anti-static wristband to prevent damage from static electricity. Once you have your tools in hand, you can begin the process of identifying your SSD SATA cable and preparing for the installation process.
By taking the time to gather the right tools and familiarize yourself with the process, you can ensure a smooth and successful upgrade to your computer’s storage capabilities.
Get a SATA Cable
If you’re planning to install a new hard drive or replace an old one, you’ll need to gather the tools required. One of the essential items that you’ll need is a SATA cable. SATA cables are used to connect your hard drive to your computer’s motherboard.
They come in different lengths, so make sure that you get the right size for your needs. Aside from a SATA cable, you’ll also need a screwdriver to remove your computer’s case and install the hard drive. It’s also best to have an anti-static wristband to protect your new hard drive from damage caused by static electricity.
Additionally, it’s a good idea to have a clean workspace where you can work without any distractions or interruptions. By having all the necessary tools and a tidy workspace, you can ensure that your hard drive installation goes smoothly and without any issues. Overall, getting a SATA cable is just one of the steps you need to take in gathering the necessary tools to install a new hard drive, but it’s an important one to get right.
Find an Available SATA Port in Your Computer
Before we embark on finding an available SATA port in your computer, let’s first put together the necessary tools. To do this, you’ll need a screwdriver, any SATA cables you may have, and, most importantly, a flashlight. While some computer cases have lighting, it’s always better to have a trusty flashlight just in case.
It’s important to note that your computer must be off and unplugged before touching anything inside the case for safety reasons. With that out of the way, let’s proceed to the next step!
Connect the Cable
If you have a desktop computer or a laptop that doesn’t have enough storage space, one solution is to add an SSD (solid-state drive) to your system. A 5 SSD SATA cable is the bridge between the SSD and your computer’s motherboard.
Connecting the cable is easy, and you don’t need any special technical skills to do it. The first step is to locate the SATA ports on your motherboard. These ports are usually located near the bottom of the board, and they’re marked SATA 1, SATA 2, SATA 3, etc.
Next, plug one end of the SATA cable into the SATA port on the SSD. The cable should snap into place, and you should feel a satisfying click when it’s securely attached. Finally, plug the other end of the SATA cable into an empty SATA port on your motherboard.
Like before, the cable should snap into place, and you should feel a click. That’s it! Your SSD is now connected to your computer, and you can start using it right away.
Insert One End of the Cable to Your SSD
When it comes to installing an SSD, connecting the cable is a crucial step. To begin, you’ll need to find the cable that came with your SSD. One end of the cable will be smaller and will connect to the port on your SSD.
The other end will have a larger connector that plugs into your computer’s motherboard. Before inserting the cable, ensure that both the SSD and computer are powered off. Once you’ve located the appropriate ports, carefully plug in one end of the cable to the SSD.
Make sure the connection is secure, but be gentle so that you don’t damage anything. Once the cable is securely connected, you can proceed with mounting the SSD in your computer case. With the cable properly connected, you’re one step closer to enjoying the benefits of a faster storage solution.
Connect the Other End of the Cable to the SATA Port in Your Computer
Connecting the SATA cable to your computer is a crucial step in setting up your storage system. Once you’ve connected one end of the cable to your hard drive or solid-state drive, it’s time to connect the other end to the SATA port on your motherboard. The SATA port is usually located near the bottom of your motherboard, and it’s easily identified by its L-shaped design.
Make sure to align the pins on the SATA cable with the ports on your motherboard, and push the cable in gently until it clicks into place. It’s important to make sure the SATA cable is securely connected to your computer to ensure your storage device works properly. Once you’ve successfully connected the cable, you can proceed to configuring your storage and installing your operating system for optimal performance.
Secure the SSD and Close Your Computer
When it comes to adding a 5 SSD to your computer, connecting it through a SATA cable is a common way to go. First, make sure to secure the SSD to your computer case using screws or mounting brackets.
Then, locate the SATA port on your motherboard and plug the SATA cable into both the SSD and the port. Make sure the cable is securely fastened and not loose. Once everything is connected, it’s important to close your computer to prevent any dust or debris from getting in and potentially causing damage.
Keep in mind that there are different types of SATA cables, so make sure you have the right one for your SSD and motherboard. By following these steps and taking necessary precautions, you can successfully connect your 5 SSD using a SATA cable and enhance your computer’s storage capabilities.
Ensure that the SSD is Properly Secured in Your Computer’s Case
When it comes to installing an SSD in your computer, it’s important to ensure it is properly secured in your computer’s case before closing it up. Firstly, locate the drive bay where the SSD will go and ensure it has a mounting bracket or screws to secure it in place. Once you have installed the SSD on the mounting bracket or using the screws, make sure it is firmly attached to prevent any damage from vibration or movement during use.
A loose SSD can also cause data transfer errors or even damage the drive. After securing the SSD, proceed to connect the power and data cables to the motherboard. Finally, close your computer case carefully, making sure to secure any screws or clasps that keep the case closed.
Remember, a well-secured SSD in your computer’s case is essential for maintaining performance and preventing any damage to the drive.
Close Your Computer and Secure the Casing
Now that you’ve installed a new SSD in your computer, it’s important to secure it properly and close up the casing. First, make sure the SSD is properly connected to the motherboard and secured in place with any necessary screws or mounting brackets. If your computer has a separate enclosure for the hard drive, be sure to secure the SSD in that as well.
Once everything is in place, it’s time to close up your computer’s casing. Start by carefully lining up the casing with the ports and connectors on the back of the computer. Then, gently slide the casing back into place, being careful not to force it or bend any of the delicate internal components.
Finally, secure the casing with the appropriate screws or locking mechanisms. With your SSD properly secured and your computer’s casing back in place, you can rest easy knowing your computer is ready to handle all your storage needs.
Test Your Connection
If you’re looking to connect a 5 SSD to your computer using a SATA cable, you’re in the right place. First, make sure that your SSD is compatible with SATA cables.
Once you’ve confirmed this, you can connect the cable to the SSD and plug the other end into your computer’s SATA port. Keep in mind that your computer may have more than one SATA port, so be sure to select the correct one. It’s essential to test your connection once everything is plugged in.
You can do this by checking if your computer recognizes the SSD. If it does, congratulations! You’re now ready to use your SSD to its full potential. However, if your computer doesn’t recognize the SSD, double-check your connections and try again.
Don’t be afraid to ask for help if you’re unsure, and remember that practice makes perfect.
Power on Your Computer and Check if Your SSD is Readily Detected
As you power on your computer and prepare to check if your SSD is readily detected, it’s essential to test your connection first. Check if all connections are properly plugged in, and wires are properly twisted. Once this is confirmed, move on to checking your device manager to see if your SSD is visible.
If you cannot see it, the SSD might not be plugged in properly, or your BIOS needs an update. Consider updating your BIOS system by checking the manufacturer’s website to download the latest files. After this is complete, try checking the device manager again.
If you can still not find it, try checking if your motherboard supports NVMe SSDs, as this might be the source of the problem. With these simple steps, you can ensure that your computer is up and running and your SSD is readily detected.
Conclusion
In conclusion, connecting a 5 SSD via SATA cable may seem daunting at first, but fear not! With a little patience and dexterity, you can easily make the necessary connections and enjoy lightning-fast data transfer speeds. Think of it like a complicated puzzle – once you figure out how all the pieces fit together, you’ll be feeling like a tech-savvy genius in no time.
So, grab your SATA cable and get ready to unleash the power of your SSD!”
FAQs
1. How do I connect a 2.5 SSD to a PC? A: To connect a 2.5 SSD to a PC, you need to use a SATA cable, connect one end of the cable to the SSD and the other end to a SATA port on the motherboard. 2. Can I use any SATA cable to connect my 2.5 SSD? A: Yes, you can use any standard SATA cable to connect your 2.5 SSD to a PC. 3. Do I need any special tools to connect my 2.5 SSD to the PC? A: No, you do not need any special tools to connect your 2.5 SSD to a PC. You only need a SATA cable and a motherboard with a SATA port. 4. What is the maximum transfer speed using a 2.5 SSD SATA cable? A: The maximum transfer speed is determined by the SATA specification version. The latest SATA III specification supports a maximum transfer speed of up to 6 Gbps.