Is your HP 14-df0023cl running slow and struggling to keep up with your tasks? Well, it might be time to upgrade your Solid State Drive (SSD). Upgrading your laptop’s SSD can significantly boost its performance and speed, providing you with a seamless user experience. The HP 14-df0023cl comes with a standard 128GB SSD, which may not be enough for some users.
If you’re someone who uses a lot of high-end software or performs heavy tasks, you will need to increase your storage capacity to keep up. Upgrading your SSD is an easy process that can be done without professional help. A new SSD comes with a higher storage capacity, faster read and write speeds, and improved overall performance.
With an SSD upgrade, you can install more programs, store more data, and transfer files faster without any lag. It’s like upgrading from walking to driving a car- you’ll be able to get things done faster and more efficiently. In this blog, we’ll talk about the benefits of upgrading your SSD on your HP 14-df0023cl and the steps to do so.
We’ll also provide you with some tips and tricks to ensure a smooth transition from your old SSD to a new one. So, buckle up and get ready to give your laptop a new lease of life!
Check Compatibility
Upgrading the SSD on your 14-df0023cl notebook can be a great way to boost its performance and storage capacity. However, before you start shopping for a new SSD, it’s important to check the compatibility of your laptop. You’ll want to make sure that the new SSD will work properly with your notebook, and that you won’t encounter any compatibility issues that could cause problems down the line.
To check compatibility, start by researching the exact specifications of your laptop, including the size and type of SSD it currently uses. Once you have this information, you can compare it to the specifications of any new SSDs you’re considering. It’s also a good idea to read reviews and user feedback from other laptop owners who have upgraded their SSDs, as they may have encountered compatibility issues or other challenges that you should be aware of before making a purchase.
By taking the time to check compatibility, you can ensure that your SSD upgrade goes smoothly and delivers the performance boost you’re looking for.
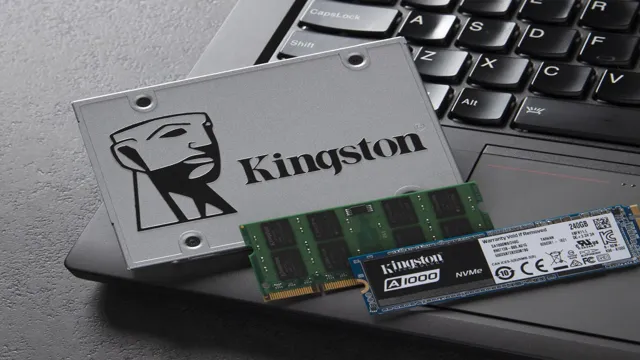
Find Suitable SSD Model
When choosing an SSD for your computer, it’s crucial to ensure compatibility. The first thing to do is to check if the SSD is compatible with your computer’s motherboard. Double-check the type and size of the interface it uses, as well as the size and form factor of the SSD.
You don’t want to end up buying an SSD that cannot physically fit into your computer’s case or that uses an incompatible interface. Next, consider the storage capacity and performance of the SSD. Think about what you’ll be using the SSD for and choose a capacity that suits your needs.
If you’re using your computer for gaming or video editing, a larger capacity SSD is recommended. On the other hand, if you’re only using your computer for basic tasks, such as web browsing and document editing, then a smaller capacity SSD will suffice. It’s also important to consider the performance of the SSD since some models might perform better than others.
Look for read and write speeds, as well as random IOPS. This information should be readily available in the SSD’s specifications. By doing all of the above, you’ll be able to find a suitable SSD model that’s compatible with your computer and meets your performance needs.
Remember that an SSD is a long-term investment and choosing the right one will help improve your computer’s speed and overall performance.
Back Up Data
If you’re looking to upgrade the SSD on your 14-df0023cl laptop, don’t forget to back up your data first! Upgrading to a new SSD can be a great way to boost your laptop’s performance, but it can also be a risky process if you don’t have a backup. Before you begin, make sure to transfer all of your important files and programs to an external hard drive or cloud storage service. This will ensure that your data is safe in case something goes wrong during the upgrade process.
Once you’ve backed up your data, you can proceed with installing your new SSD. With the right tools and a bit of know-how, upgrading your laptop’s SSD can be a quick and easy way to improve its performance. Just remember to take the time to back up your data before you begin, so you can stay worry-free throughout the process.
Cloud or External Drive Backup
When it comes to backing up your important files and data, you have multiple options to choose from. The two most common methods are cloud backup and external drive backup. Both options have their pros and cons, but ultimately it depends on your personal preference and needs.
Cloud backup is a great option for those who want to access their files from anywhere, as long as there is an internet connection. It also offers automatic and continuous backup, so you don’t have to worry about manually backing up your data. One concern with cloud backup, however, is security.
You’re entrusting your data to a third party, so it’s important to ensure that they have proper security measures in place. External drive backup, on the other hand, allows you to physically store your data on a device that you own and control. This can provide some peace of mind knowing that your data is within your reach and not at the mercy of a third party’s security measures.
However, it requires manual backup and can be susceptible to physical damage or loss. Ultimately, it’s important to have a backup plan in place regardless of which method you choose. Cloud backup and external drive backup can both be viable options, and in some cases, using a combination of both may offer the most comprehensive backup solution.
It’s also important to regularly test your backups and ensure that they are working properly, so you can have the peace of mind that your important data is protected no matter what.
Prepare for Installation
If you’re looking to upgrade the SSD on your 14-df0023cl laptop, there are a few things you can do to prepare for a smooth installation. First, make sure to back up all of your important files and data to an external hard drive or cloud storage. Then, shut down your laptop and unplug it from any power source.
It’s also a good idea to ground yourself by touching a metal object before handling any internal components to prevent static shock. Next, locate the SSD and determine the type of connector it uses. You’ll need to purchase a new SSD with the same connector and size as the old one.
Once you have the new SSD, carefully remove the screws holding the old SSD in place and gently remove the connector. Then, insert the new SSD into the same slot and secure it with the screws. Finally, reattach any cables or connectors that were disconnected during the process and power on your laptop to make sure everything is working properly.
By taking the time to prepare and follow these steps, you’ll be able to upgrade your SSD quickly and easily without risking data loss or damaging any internal components. With a faster and more reliable SSD, you’ll be able to enjoy improved performance and quicker load times on your 14-df0023cl laptop.
Gather Necessary Tools
Before starting the installation process, it’s essential to prepare all the necessary tools you might need. This will speed up the process and prevent interruptions. First, you’ll need to have a ladder or a step stool to access the area where you’ll be installing the item.
Also, make sure you have all the required hardware as some items come with screws, nuts, and bolts that are specific to the model. A screwdriver and a drill will come in handy when mounting the unit on the wall. Pay attention to the type of screws, as some require special bits.
If you’re going to be working with electrical items, make sure you have wire strippers, pliers, and a voltage tester. Always wear protective gear like work gloves and safety glasses to prevent injury. Having everything you need at arm’s reach will make the installation process much smoother and stress-free.
Turn Off and Unplug Laptop
Before starting the installation process, it is essential to prepare your laptop. The first step towards this is turning off and unplugging your device. This may sound like a no-brainer, but it’s crucial to avoid any mishaps during the installation process.
Make sure you save all your work and close all the applications before you shut it down. Press and hold the power button until the device shuts down completely, and then unplug the charger and all other connected cables. This ensures that there is no electrical current running through the laptop, which can cause damage to both the system and the installation process.
By properly preparing your laptop for installation, you can ensure that the process goes smoothly, and you can enjoy your applications without any issues.
Replace Old SSD with New SSD
If you’re looking to upgrade the SSD on your 14-df0023cl laptop, you’re in luck! It’s a fairly straightforward process that can greatly improve your overall system performance. Firstly, make sure to back up all important data from your current SSD. Then, access the laptop’s internal components by removing the bottom cover screws.
Locate the old SSD and carefully remove it from its slot. Insert the new SSD in the same slot, making sure it’s secured properly. Finally, replace the bottom cover and screw it back on.
Keep in mind that you may need to reinstall the operating system and software on your new SSD. With your new SSD in place, you’ll be able to enjoy faster boot times, improved application performance, and overall better system responsiveness. Don’t forget to dispose of your old SSD properly, or better yet, find a way to repurpose it to reduce waste.
Open the Laptop
If you’re looking to give your old laptop a new lease on life, one of the best things you can do is replace its old SSD with a brand new one. Solid State Drives (SSDs) are a game-changer when it comes to computer performance, providing much faster read and write speeds than traditional hard drives. Upgrading to an SSD can help your laptop boot up faster, open applications more quickly, and improve overall system responsiveness.
The process of replacing an SSD isn’t too complicated, but there are a few things you’ll need to consider before diving in. Firstly, you’ll need to make sure that your laptop’s casing can be easily opened. Once you’ve confirmed that, you’ll need to find an SSD that’s compatible with your laptop’s motherboard.
Just like swapping out memory modules, you’ll need to remove the old SSD and insert the new one in its place. It’s important to follow all the steps carefully and to make sure you’re properly grounded to avoid damaging any components. With a little bit of care and attention, upgrading your laptop’s SSD is a straightforward way to breathe new life into an old machine and improve its overall performance.
So, go ahead and give it a try, you might just be surprised at the difference it makes!
Remove Old SSD and Insert New SSD
If you’ve got an older SSD that’s starting to slow down or fail, it might be time to replace it with a new one. And don’t worry – swapping out your old SSD for a new one is a lot easier than you might think. First, shut down your computer and disconnect it from any power sources.
Once you’ve opened up your computer case, locate your old SSD and carefully remove any screws or connectors holding it in place. Then, insert your new SSD into the same slot and secure it in place with screws or other connectors. Finally, reconnect any cables or power sources, close up your computer case, and boot up your system.
With your new SSD in place, you should notice a significant improvement in both speed and performance. So go ahead and make the upgrade – your computer (and your sanity) will thank you for it.
Install OS and Data Backup
If you’re looking to upgrade the SSD on your HP 14-df0023cl laptop, you’re in luck! It’s a fairly straightforward process that you can do at home with some basic tools. First, you’ll need to purchase a new SSD that’s compatible with your laptop. Once you have the new SSD, you’ll need to back up any important data from your current drive.
This can be done using an external hard drive or cloud storage service. Then, you’ll need to create a bootable USB drive with the operating system you want to install on the new SSD. This can be an existing copy of Windows or another OS you prefer.
Insert the new SSD into your laptop and boot from the USB drive. Follow the prompts to install the operating system onto the new SSD. Once the installation is complete, you can transfer your backed-up files to the new drive and enjoy the increased speed and performance of your upgraded SSD.
Upgrading your laptop’s SSD can breathe new life into an older machine, so why wait? Get started on your upgrade today!
Boot Laptop from External Drive or Cloud
Being able to boot your laptop from an external drive or cloud can be incredibly useful, especially when it comes to installing a new operating system or backing up important data. When it comes to installing an OS, having it on an external drive or cloud can be a lifesaver if something goes wrong during the installation process. Additionally, booting from an external drive means you can use the same copy of an OS on multiple computers without having to install it separately each time.
Similarly, backing up your data to an external drive or cloud ensures that your files are safe in case of a system crash or other disaster. You can simply boot your laptop from the backup and be up and running in no time. Overall, being able to boot from an external source is an important capability for any laptop user.
Follow OS Installation Instructions
In order to ensure that your data is properly backed up and your device is secure, it is crucial to follow the installation instructions provided for your operating system (OS). This process may seem tedious, but it is necessary to avoid any potential mishaps or lost data. By carefully following the step-by-step instructions provided by the OS, you can ensure a smooth and secure installation process.
Additionally, it is important to backup any important data before installing the new OS, as there is always a risk of data loss during installation. Think of the installation process like building a sturdy foundation for a house. Just as a shaky or poorly-built foundation can jeopardize the structural integrity of a home, an improper installation can lead to data loss or other issues.
By taking the time to follow the OS installation instructions, you can ensure that your device is properly set up and ready to go. Remember, “proper preparation prevents poor performance.”
Verify SSD Upgrade Success
So, you’ve decided to upgrade the SSD on your 14-df0023cl laptop – congrats! It’s a great way to give your device a boost in speed and storage capacity. But how do you verify if the upgrade was successful? Firstly, you should check if the new SSD is present under the Device Manager. To do this, right-click on the Windows icon, and select “Device Manager.
” After that, navigate to “Disk Drives” and check if the new SSD is listed. If it is, congratulations! You have successfully upgraded the SSD. However, if it’s not there, it could mean that there was a problem in the installation process.
Don’t worry, though; you can troubleshoot the issue by checking the BIOS setting or reseating the SSD. Finally, you should run some speed tests to ensure that your upgraded SSD is performing as expected. Overall, upgrading the SSD on your 14-df0023cl laptop is a fantastic investment, but it’s crucial to ensure that the installation process was successful, and the new SSD is working correctly to get the most out of it.
Conclusion
Upgrading your SSD on the 14-df0023cl is like putting a rocket engine in a car – it’s a game-changer. With a new, faster solid-state drive, you’ll experience turbocharged speeds and performance, all while saving space and extending the life of your laptop. So, don’t resist the urge to make a change – take the plunge and upgrade your SSD today!”
FAQs
FAQ 1: What type of SSD can be upgraded in 14-df0023cl? Answer: The 14-df0023cl laptop is compatible with M.2 NVMe SSD, which is the recommended SSD for upgrading. FAQ 2: How much storage capacity can I upgrade for my 14-df0023cl laptop? Answer: The 14-df0023cl laptop supports up to 2TB of storage capacity when upgrading the SSD. FAQ 3: Is it possible to upgrade the SSD on a 14-df0023cl laptop on my own? Answer: Yes, it is possible to upgrade the SSD on your own. However, it is recommended to get it done by a professional to avoid any damage to the laptop. FAQ 4: Do I need any specific tools to upgrade the SSD on 14-df0023cl laptop? Answer: You will need a screwdriver set, an M.2 NVMe SSD, and a data transfer kit to upgrade the SSD on your 14-df0023cl laptop. It is recommended to get the appropriate tools before attempting to upgrade the SSD.